# Add Inbox
An Inbox shows the connection of a website or a Facebook page to CarbonChat. You can have unlimited inboxes in your CarbonChat account.
Inbox can be added to your account in any of the 3 ways as shown below.
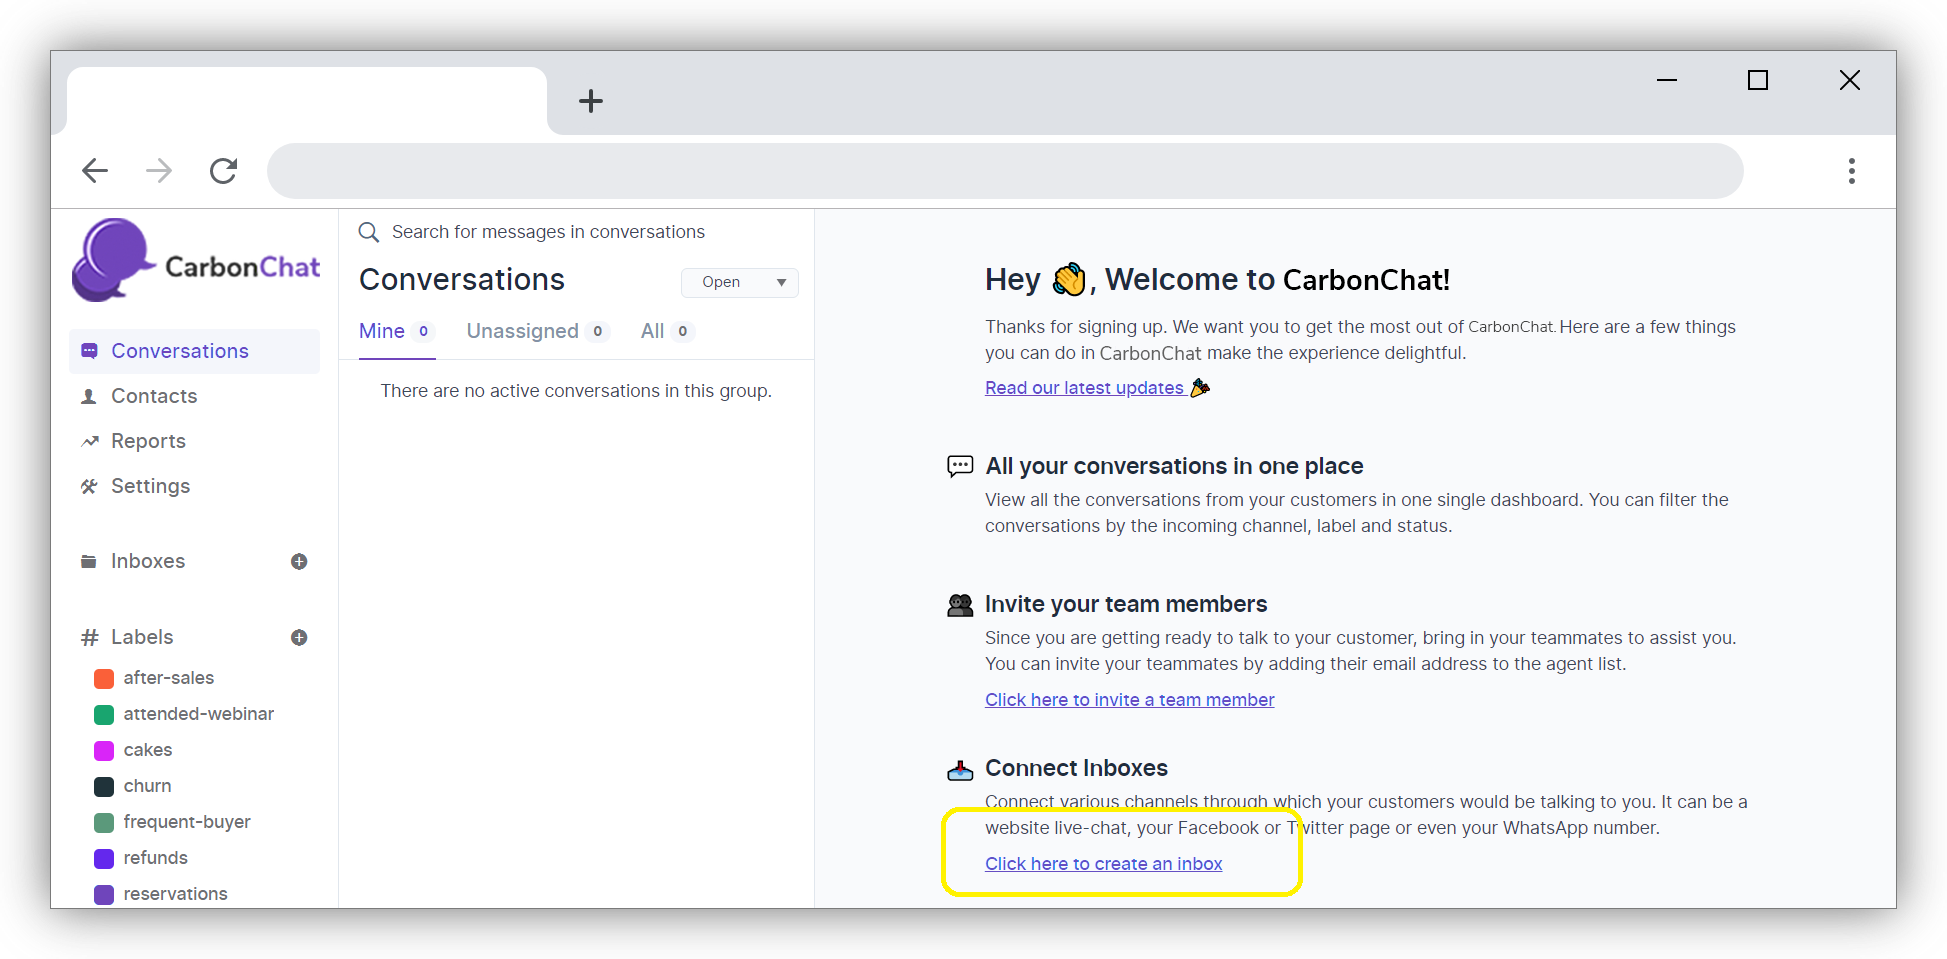
One way is to click on 'Click here to create an inbox' like in the picture given below.
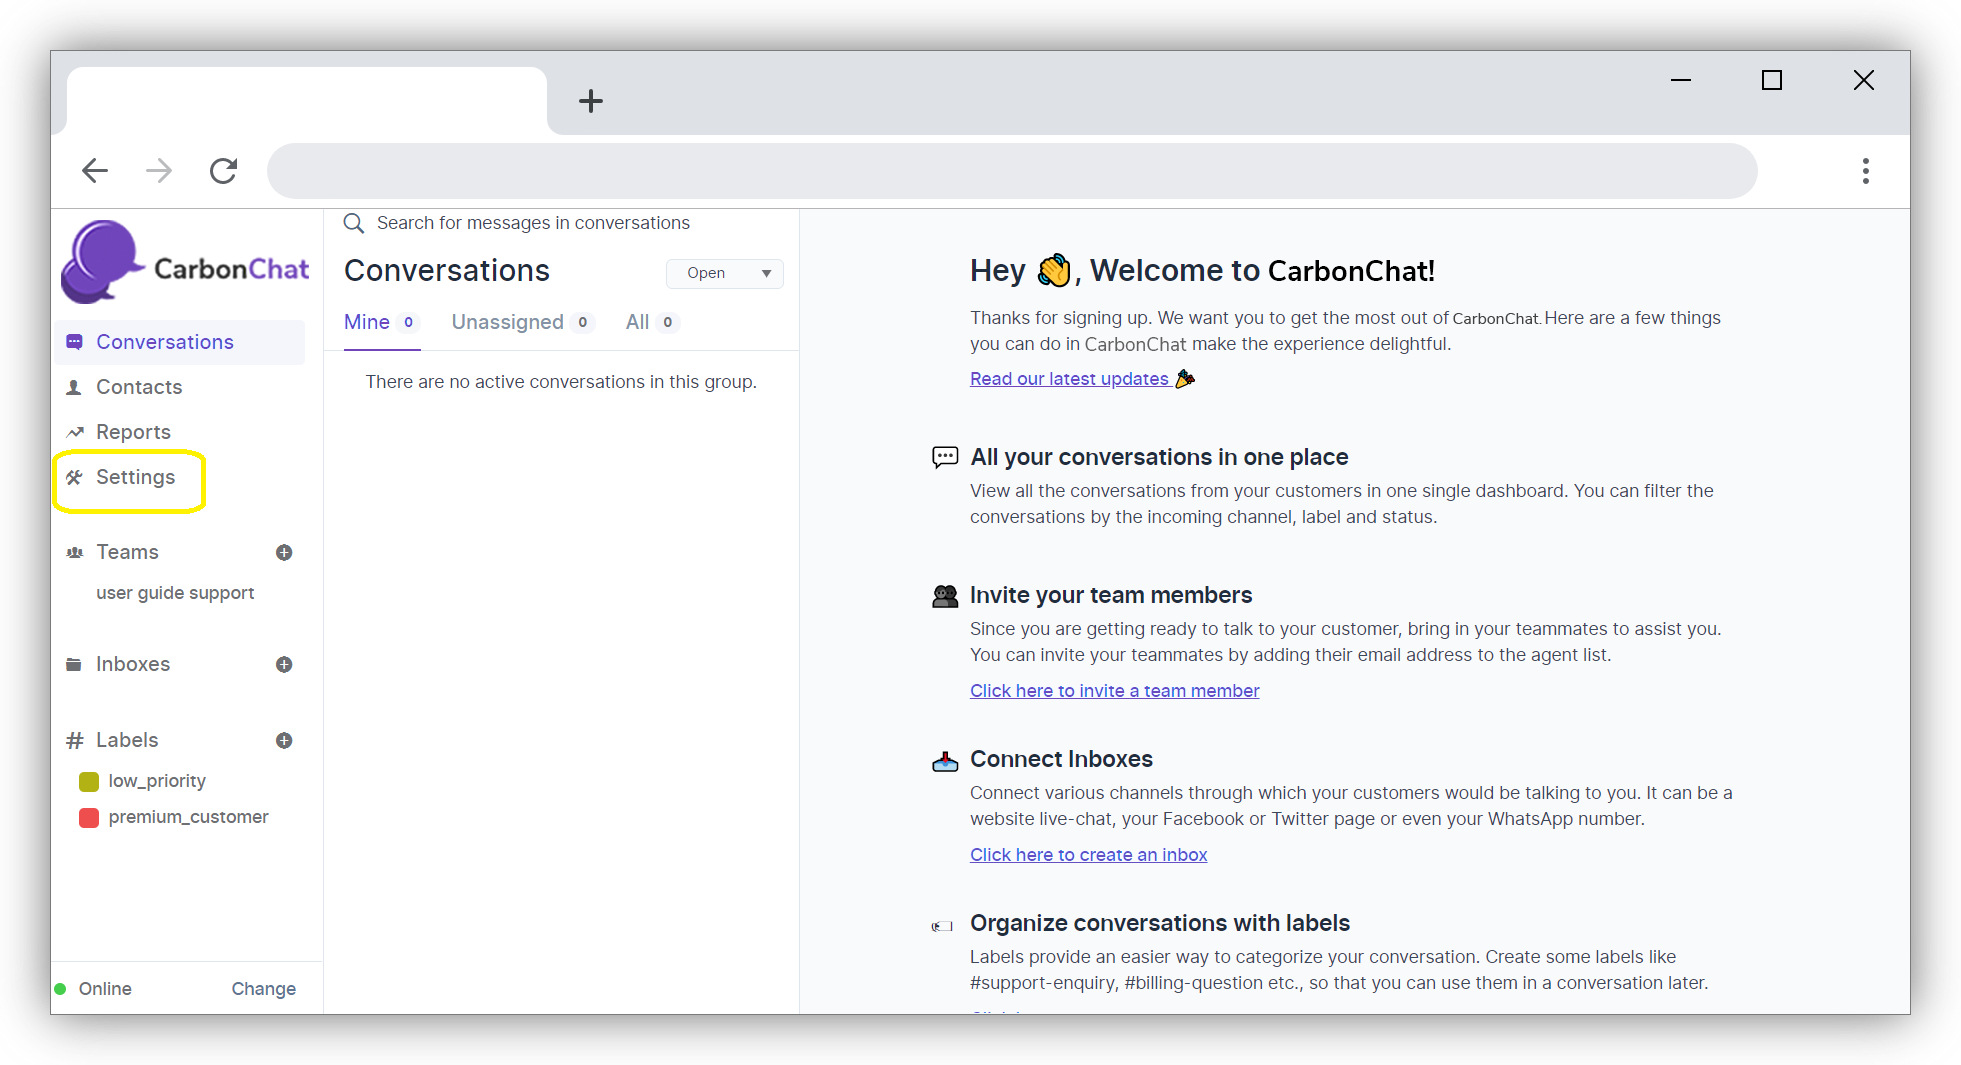
Second way to create Inbox is to click on Settings on CarbonChat Dashboard home page and then to Click on Inboxes.
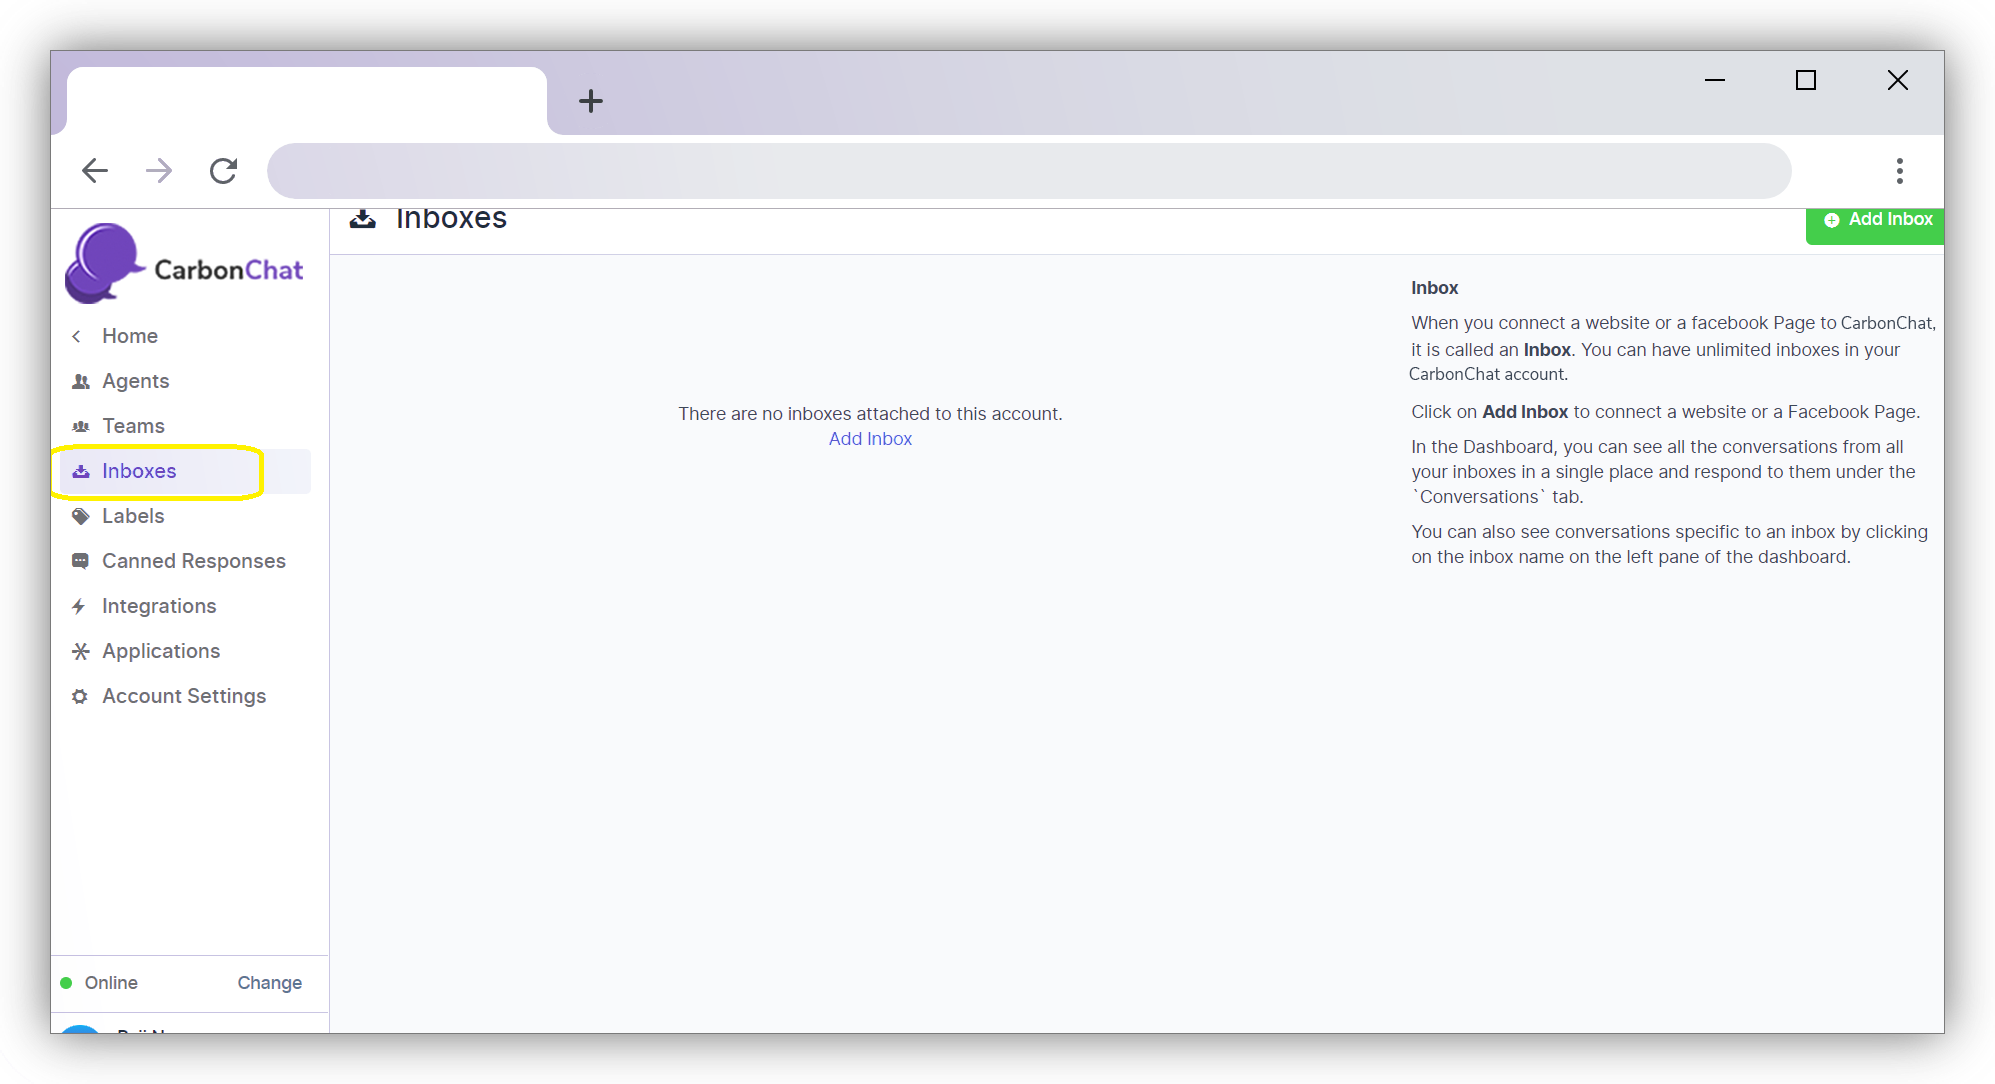
Click on Inboxes to reach the Inbox screen. Here you can add Inboxes and once added can be viewed here.
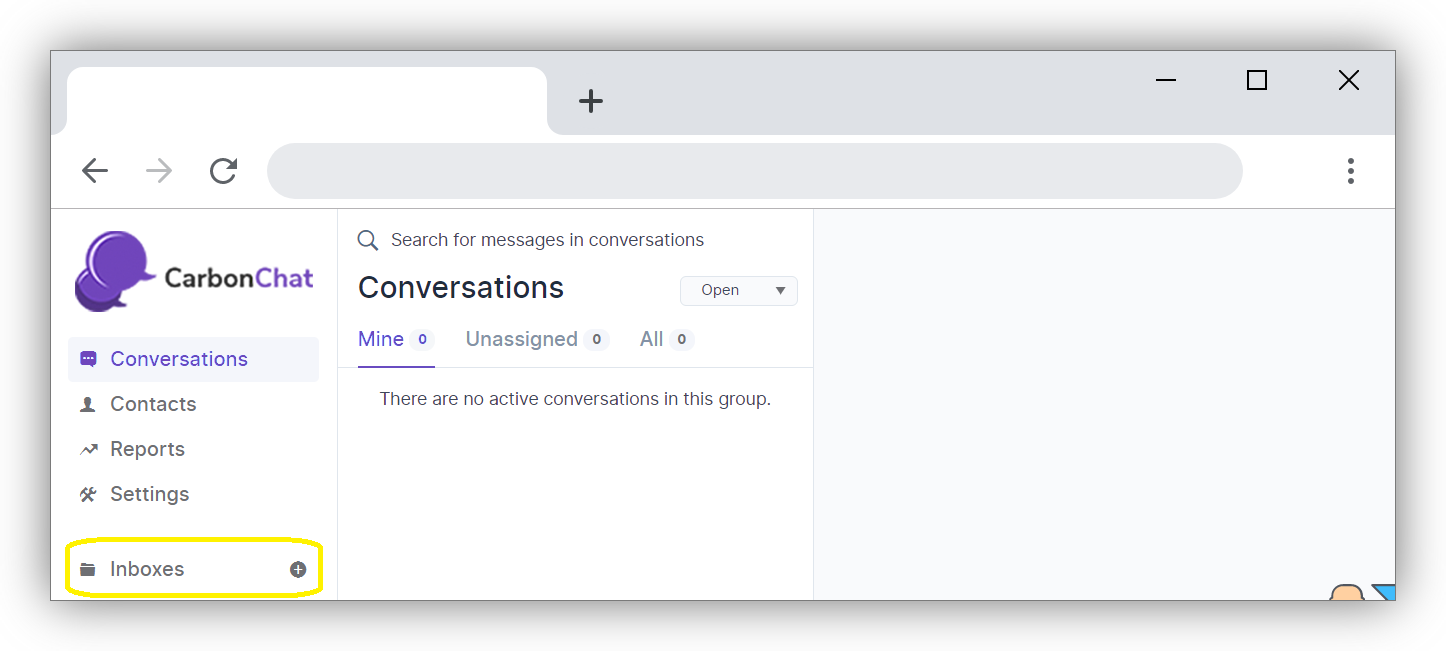
Third way to create Inbox is to click on the '+' button near the Inboxes link on CarbonChat Home Screen itself.
Click on Add Inbox Button on Top-Right Corner of the page.
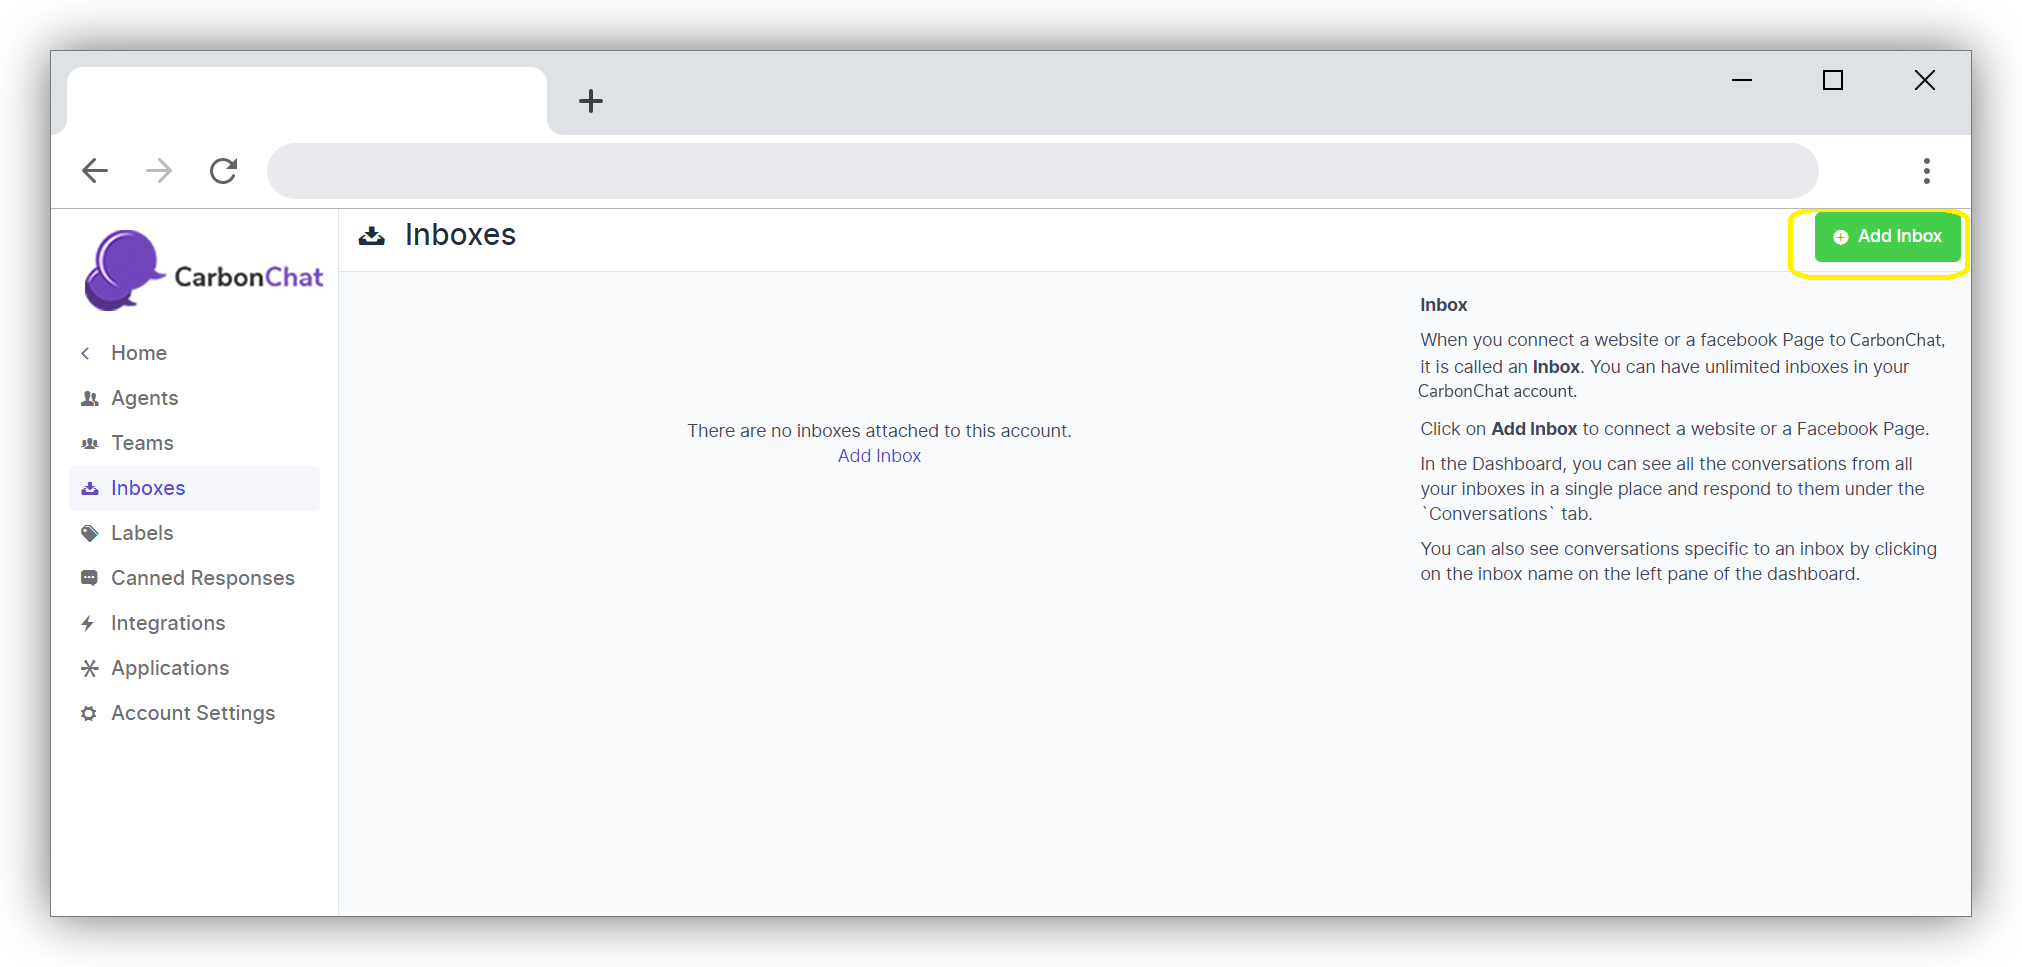
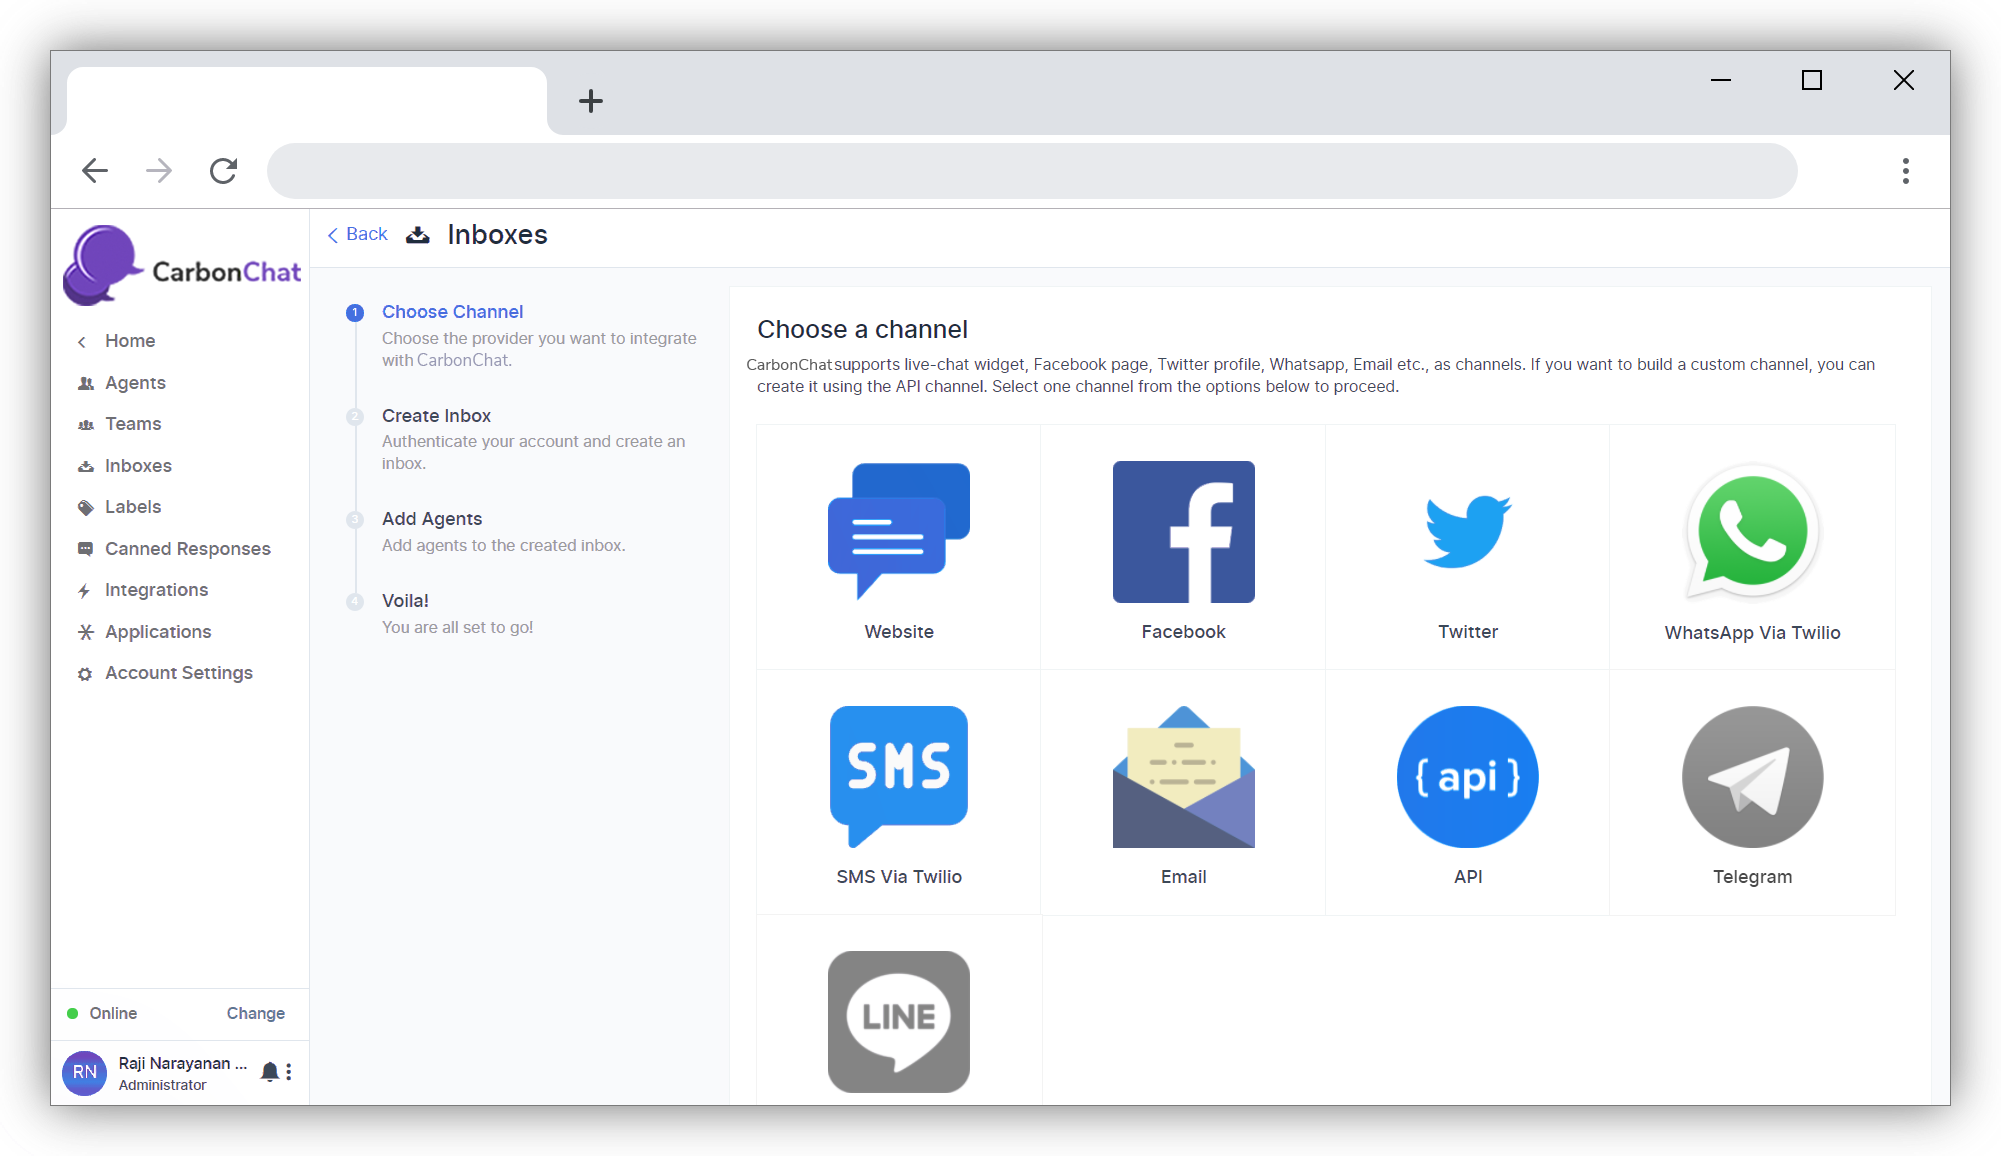
A screen as given below opens, where Inbox can be added for various Channels. Eg: Website, Facebook, Twitter, WhatsApp, SMS, Email, API, Telegram, and Line. Inboxes would be connected to the front-end Widgets placed in Website or other channels. Creation of adding Widget is given in Setting up Widget (opens new window).
# Inbox for a Website
Here is an example of how to add an Inbox for a Website. Click on Website Button.
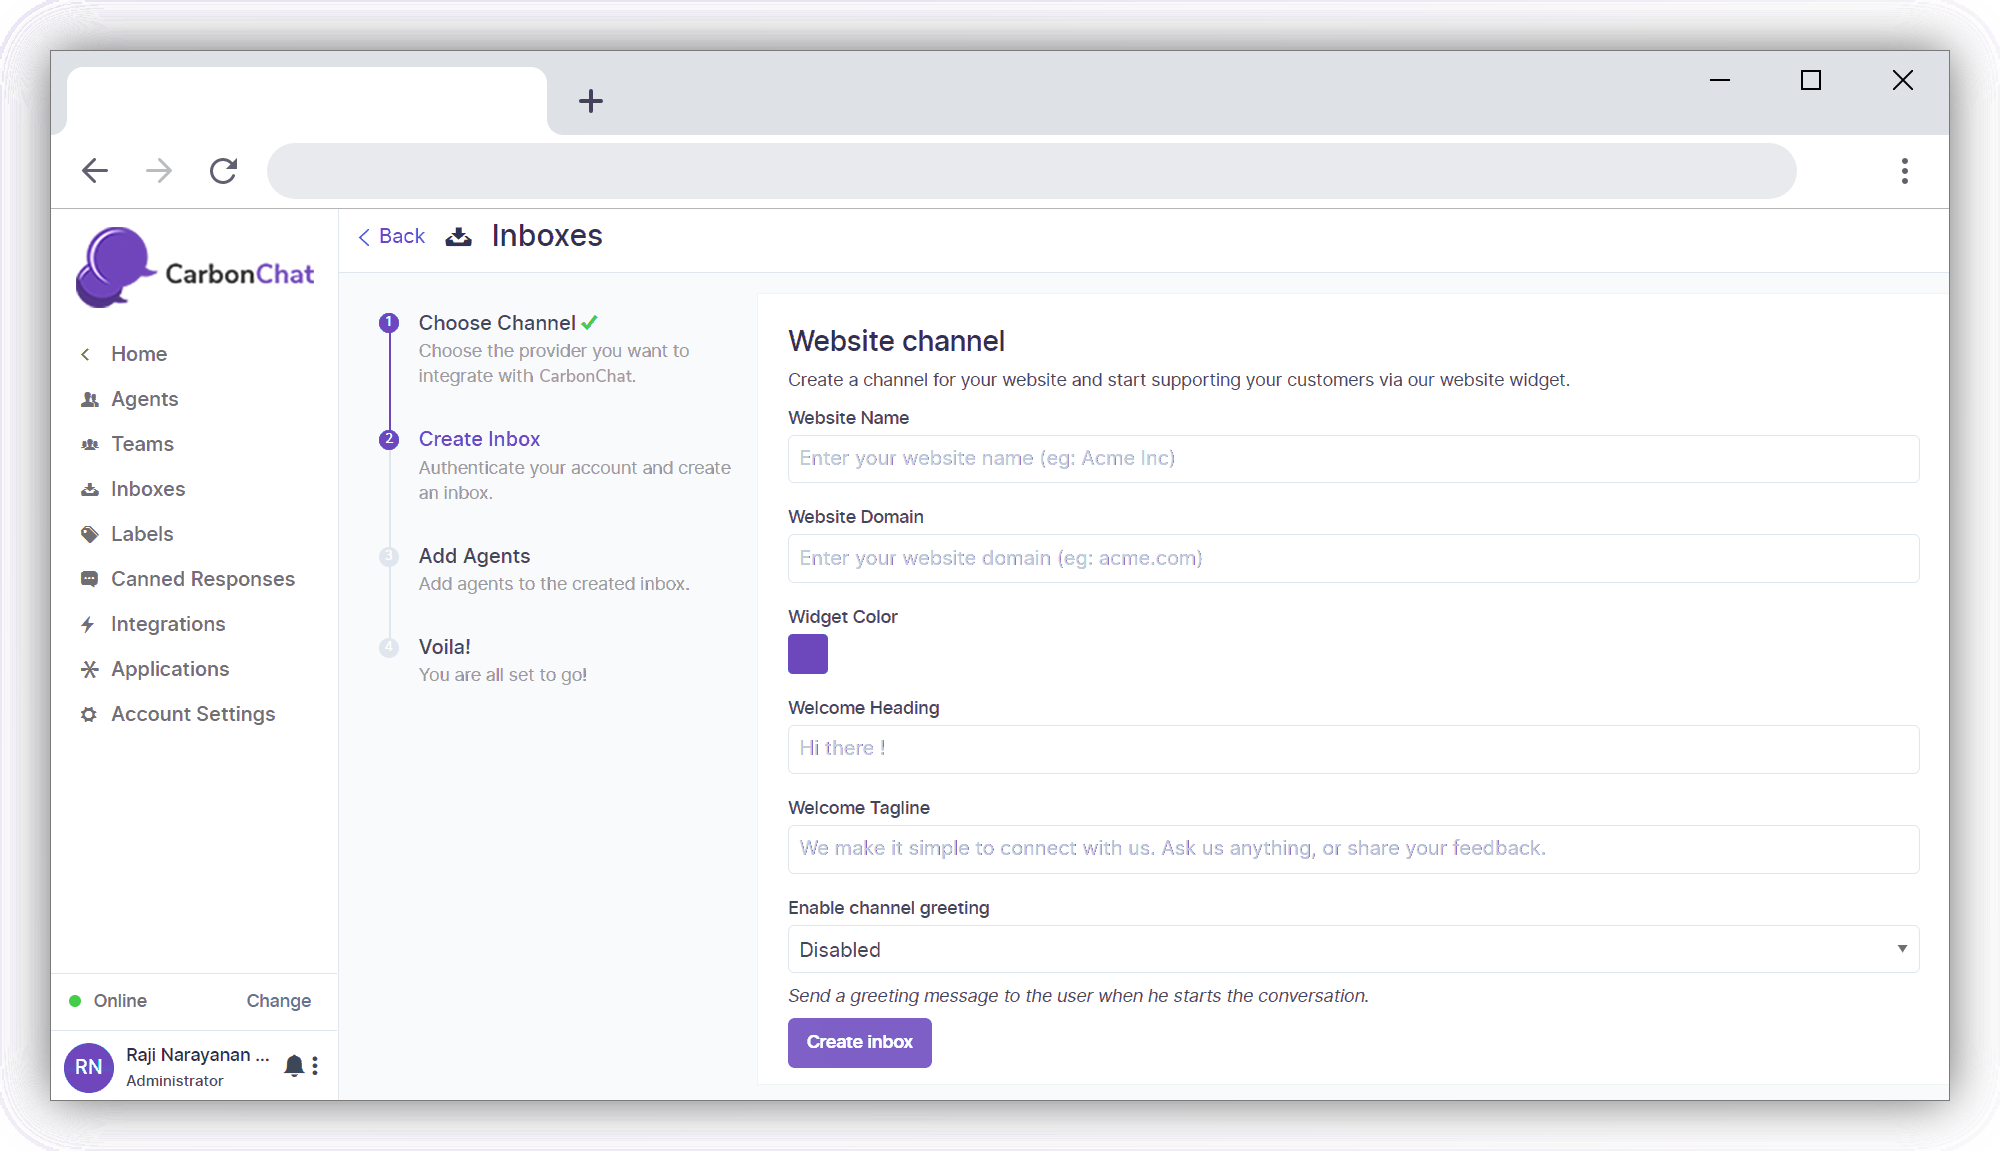
| Field Name | Value | Remarks |
|---|---|---|
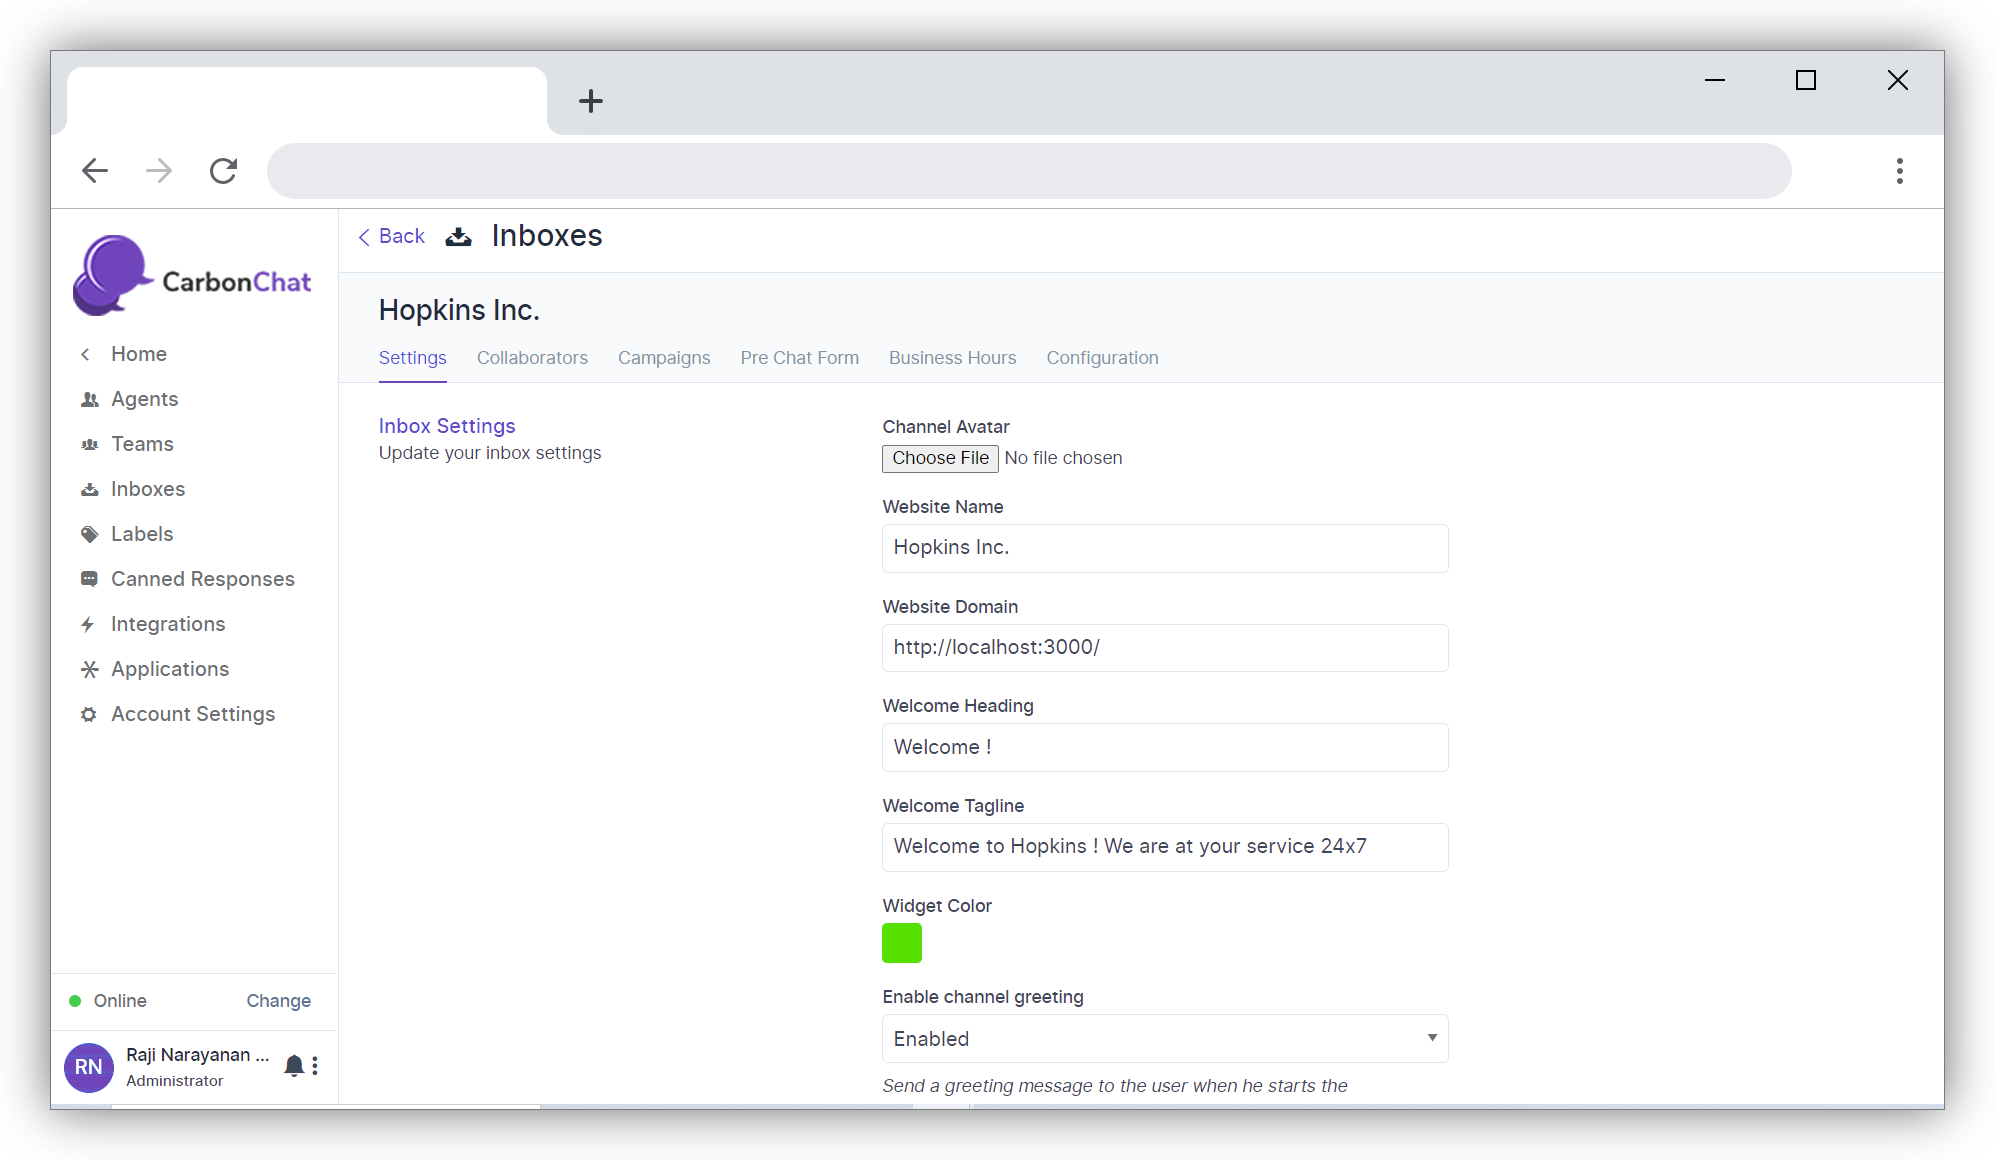
| Website Name | Enter Name of your Website | eg: Hopkins Inc. |
| Website Domain | Enter the link to your Website | eg: www.hopkins.com (opens new window) |
| Widget Colour | Select the colour by clicking the pallet | |
| Welcome Heading | Give a Greeting with which you would like to address the customer | eg: Welcome ! |
| Welcome Tagline | Give a Tagline representing your company | eg: Welcome to Hopkins ! We are at your service 24x7 |
| Enable Channel Greeting | Select Enabled or Disabled | Enable to Send Greeting message when customer starts conversation |
| Channel Greeting Message | Give a greeting with which you would like to start the conversation | eg: Hi. How can we help you? |
Once all details are entered, click on Create Inbox Button.
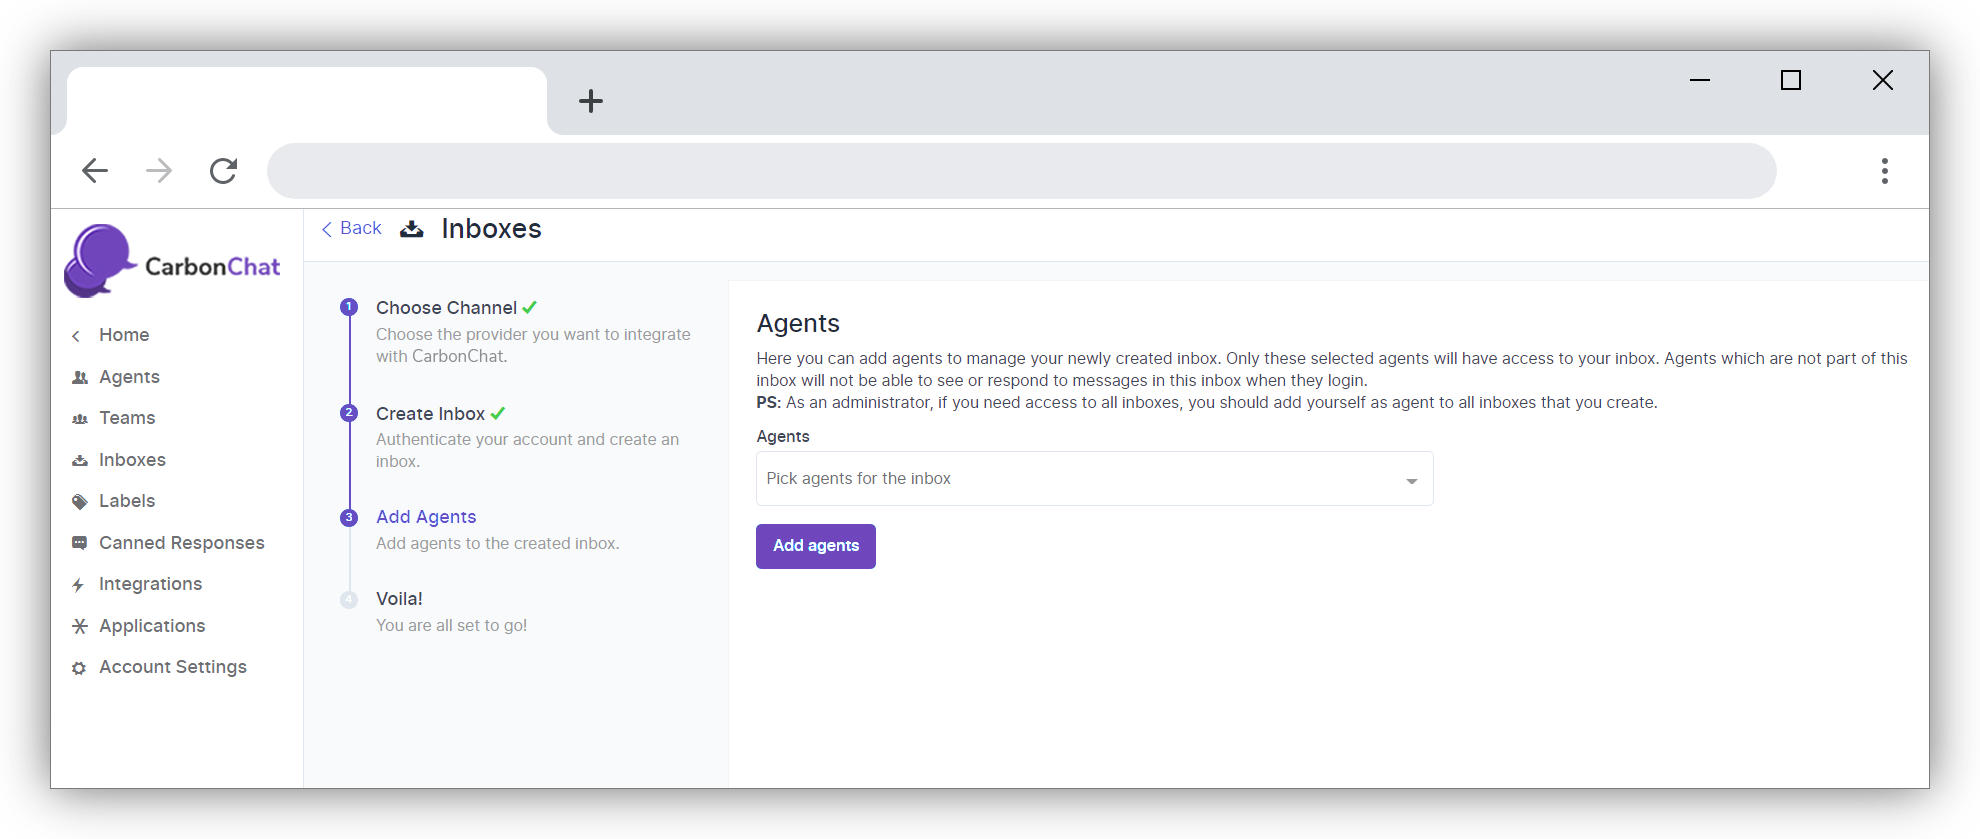
The Next session will open up to Assign Agents to the Inbox. Only if an Agent is associated with the Inbox, the conversations will be directed to the agent. Even if you are an Administrator, you need to add your name as agent to the Inbox to see the Inbox on your screen. Select the Agents from the drop-down(if agents have not been added go to Add Agent (opens new window)) and click on Add agents.
The screen below has the code snippet which can be directly used to install the widget. You can click on Copy button to copy and then paste in the root code (opens new window) of your website.
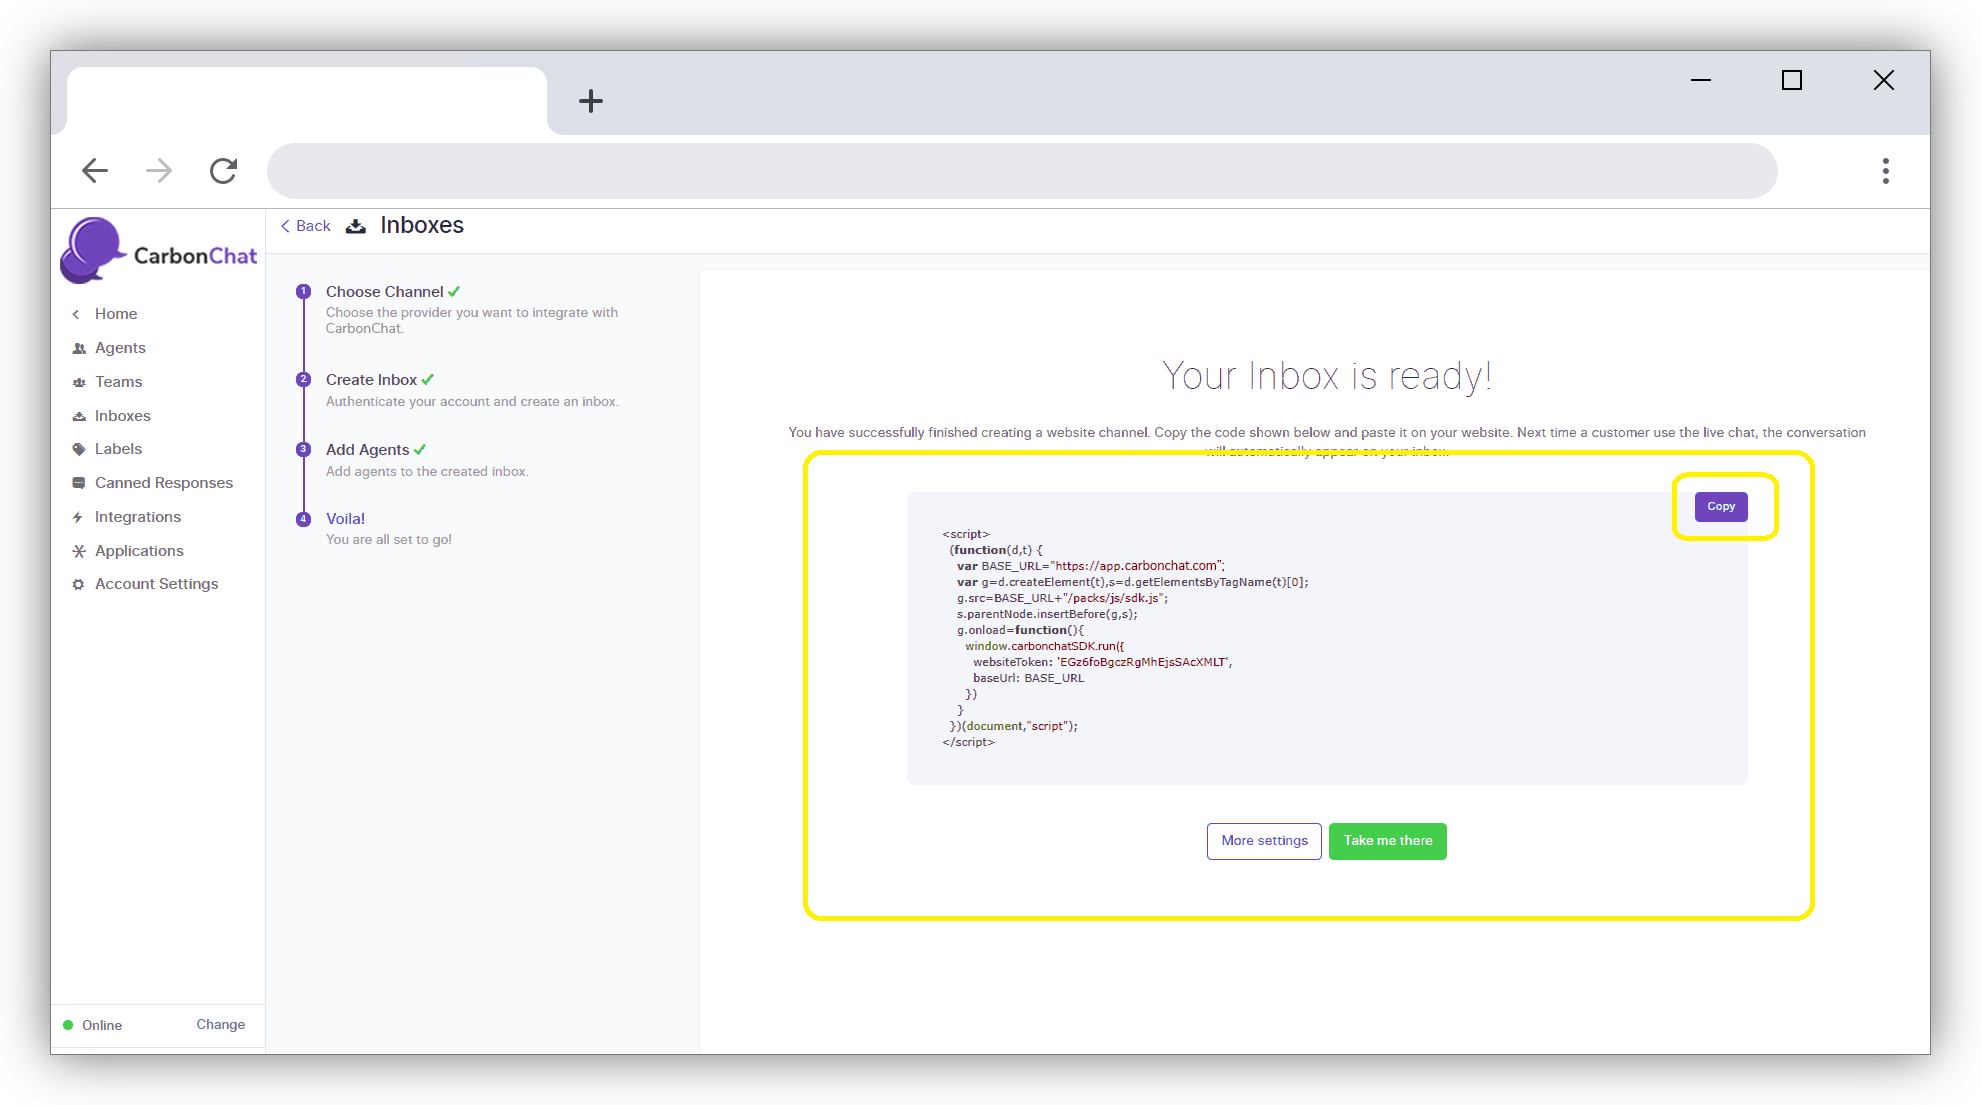
If you click on 'More settings' Button, you will be taken to Additional Settings for Inbox. If you click on 'Take me there' button you will be taken to the newly created Inbox directly.
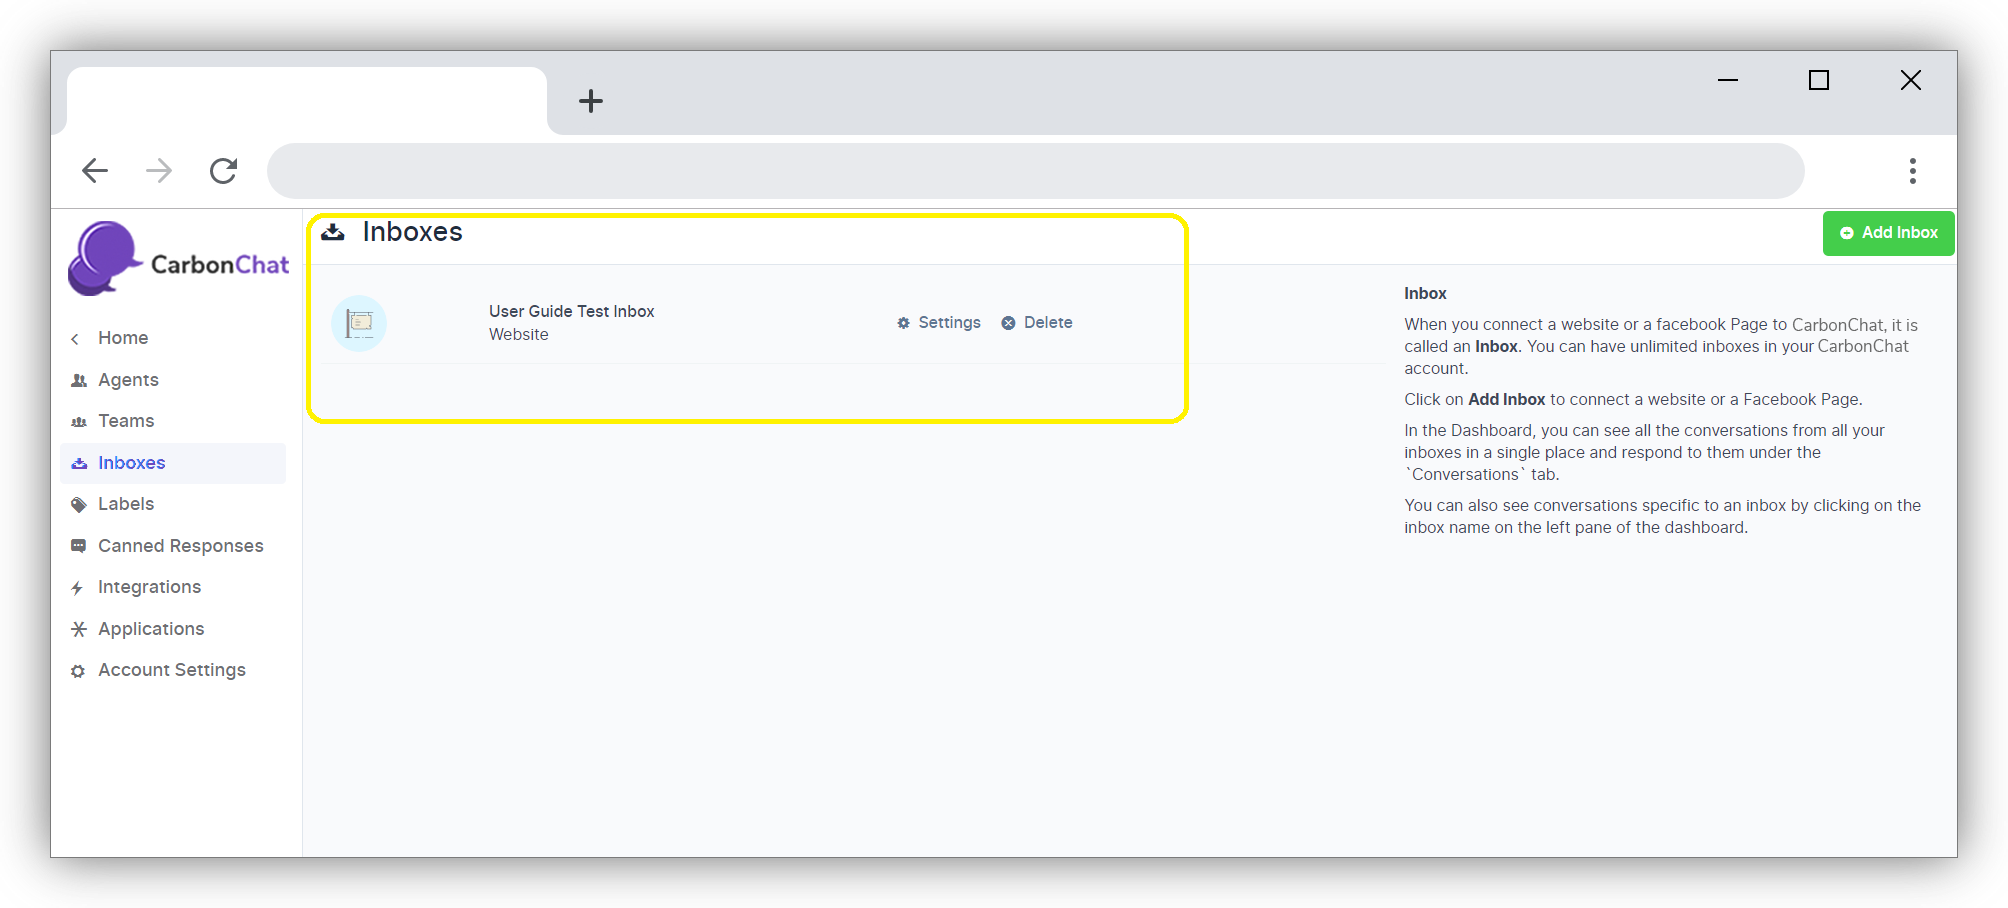
Now if you click on Inboxes link on the home screen, you can see that the new Inbox has been created for use.
# Additional Inbox Settings
Click on Settings. The page below will open up.
Scroll down to the screen shown below where you can set up the various notifications you would like to receive when your inbox starts functioning.
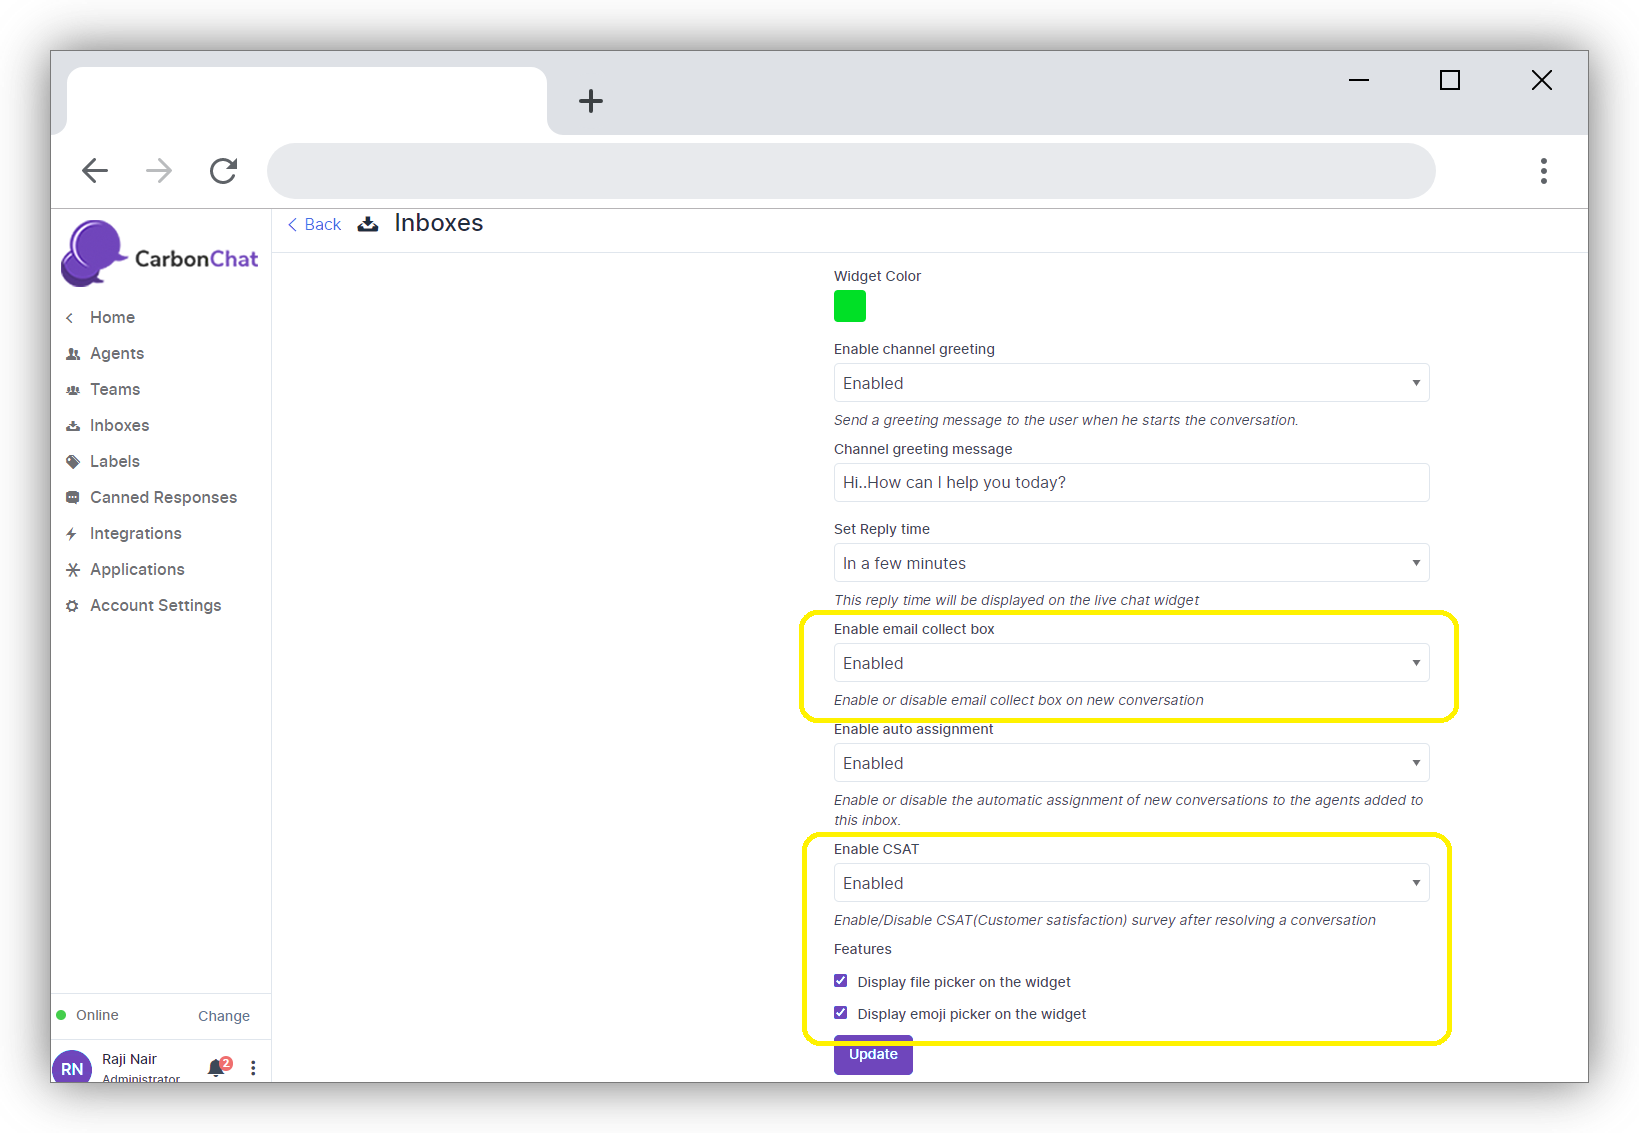
Here, Enable email collect box is Enabled by default. This means an automatic message to collect the e-mail id will be displayed once the customer starts a conversation. Customer/End user will receive a prompt to enter e-mail id.
Also, there is an option to Enable CSAT. Once you enable this Customer Satisfaction survey will be launched on Resolving each ticket. The CSAT results can be viewed later in Reports section. Click on 'Update' button to save the changes you have made.
# Collaborator
Click on Collaborators. You can add or remove agents who are already added to the inbox.
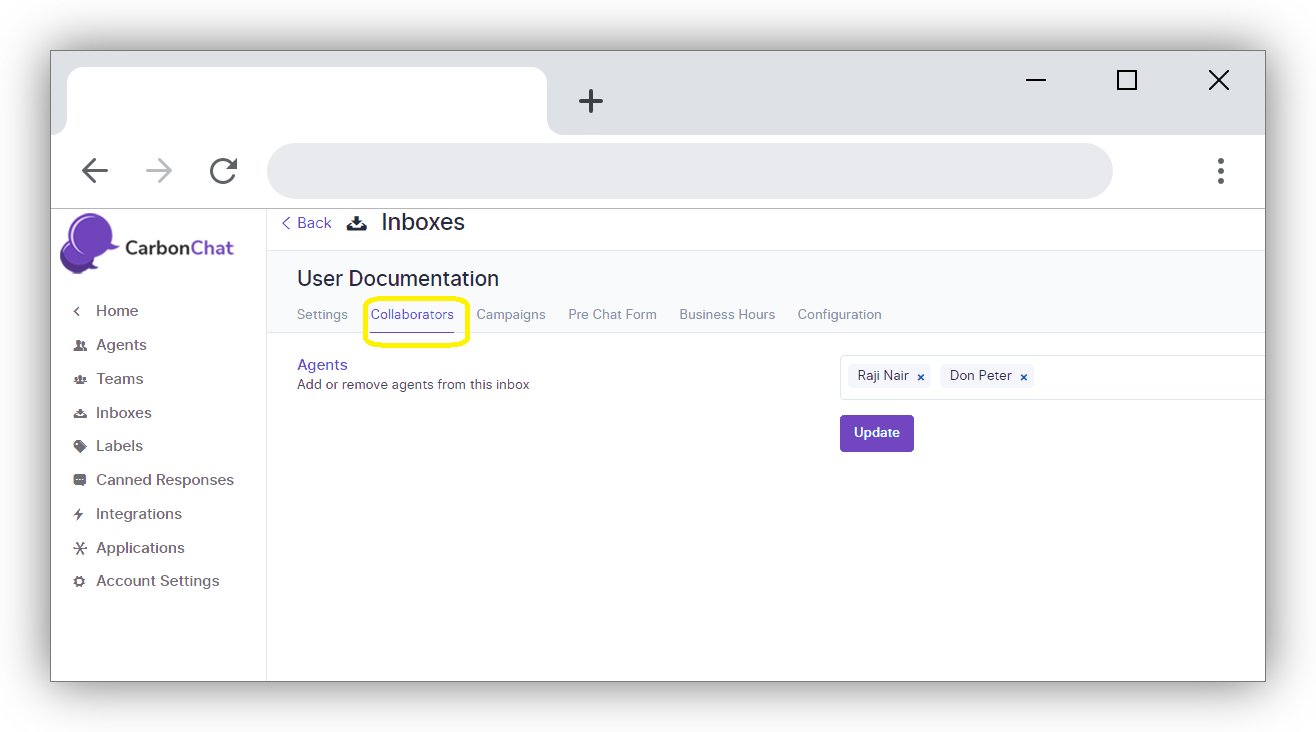
Click on Update to save the changes.
# Campaigns
Click on Campaigns tab on the Inbox Settings. Here you can create 'Campaigns'. Campaigns are similar to advertisements or one liners which will be automatically displayed to the customer or end user. Once the customer visits your site and has not initiated the conversation through the widget for the specified time (let’s say 10 seconds), an automatic message will be displayed to the customer, prompting to begin the conversation.
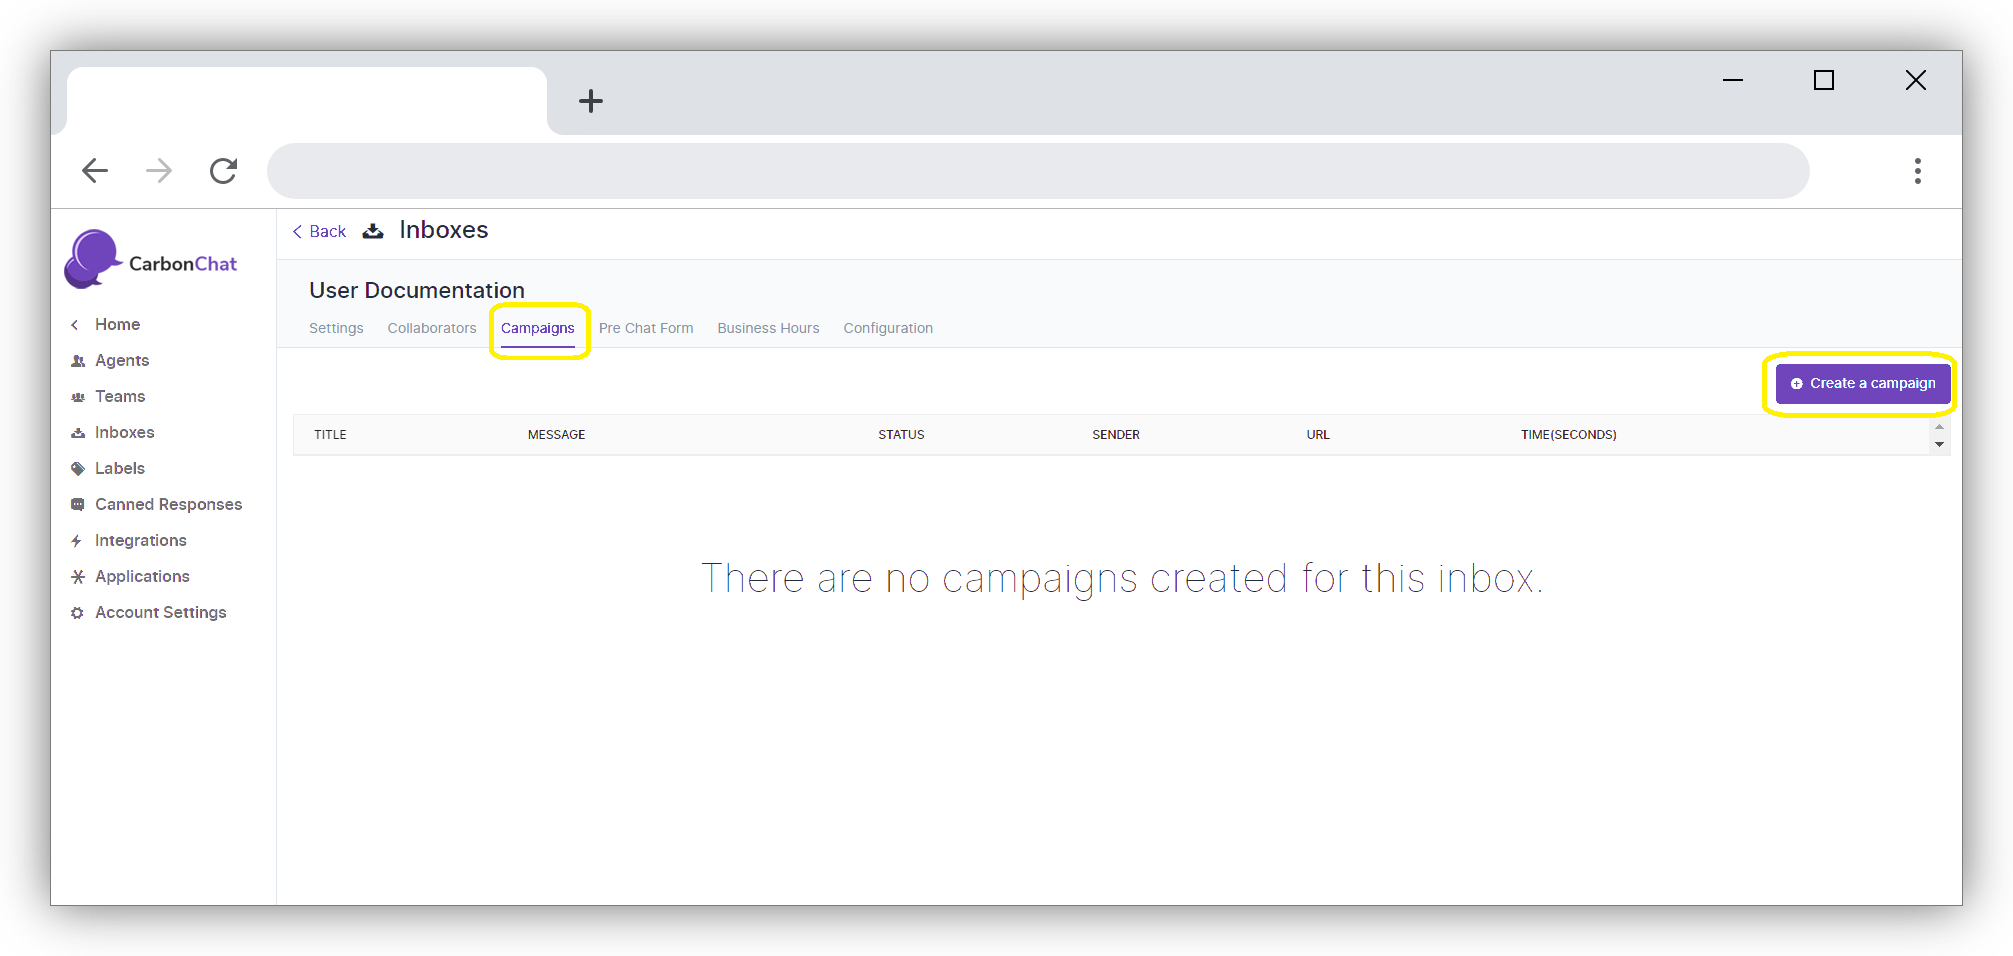
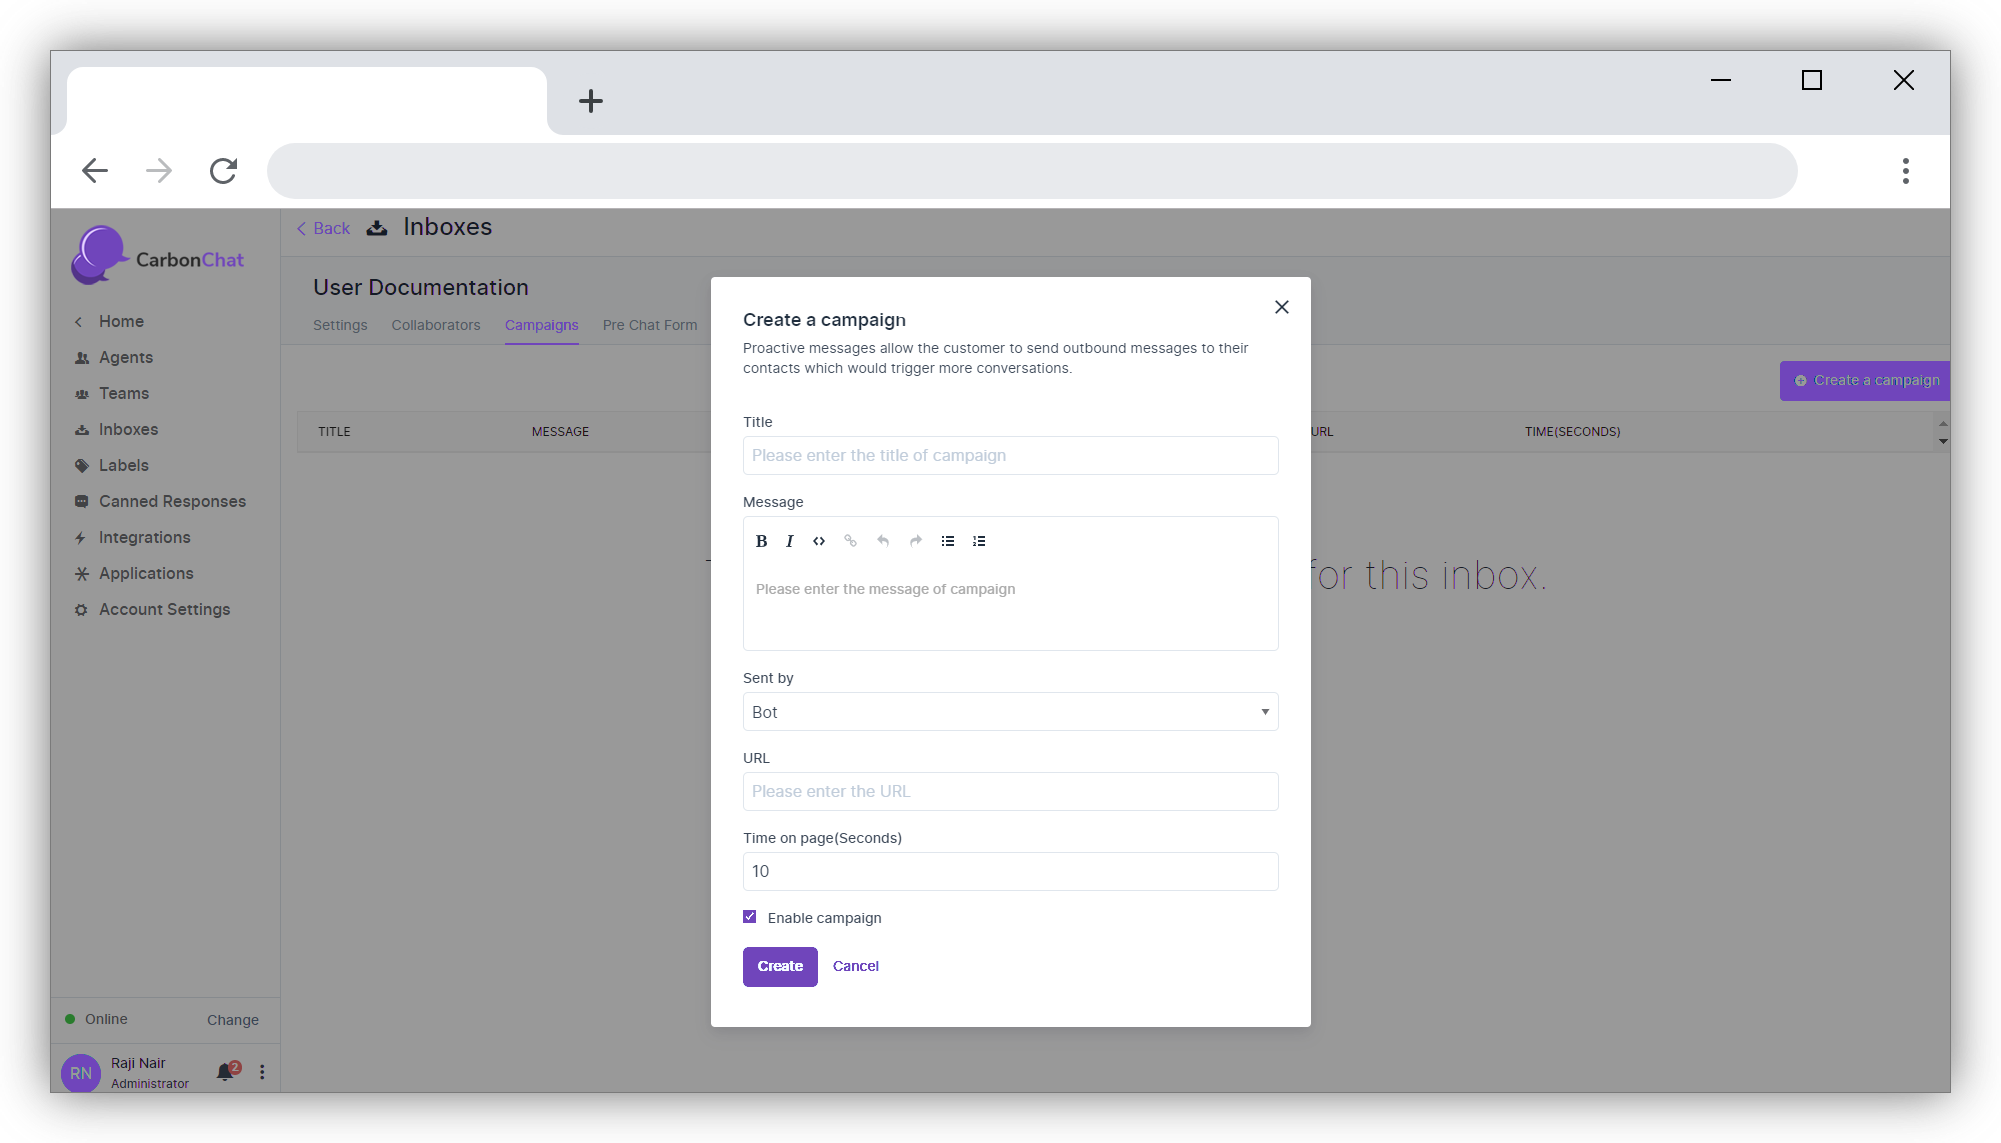
Click on Create a Campaign on the right-hand side. Details of the Campaign can be given in the screen below.
| Field Name | Value | Remarks |
|---|---|---|
| Title | Give a name or Title for your campaign | Initiate Campaign |
| Message | Give a message to initiate conversation with the customer | We are just a click away |
| Sent by | Select the value from the drop-down. Bot or agent name can be selected | Whatever is selected here will be displayed on screen along with campaign message |
| URL | Give the URL of the site for which the widget is configured | eg: www.hopkins.com (opens new window) |
| Time on page(Seconds) | Give the number of seconds after which the campaign message should be displayed to customer | by default, it is 10 |
| Enable campaign | click on check box if the message needs to be sent on screen after the set time | if this is disabled, message will not be sent |
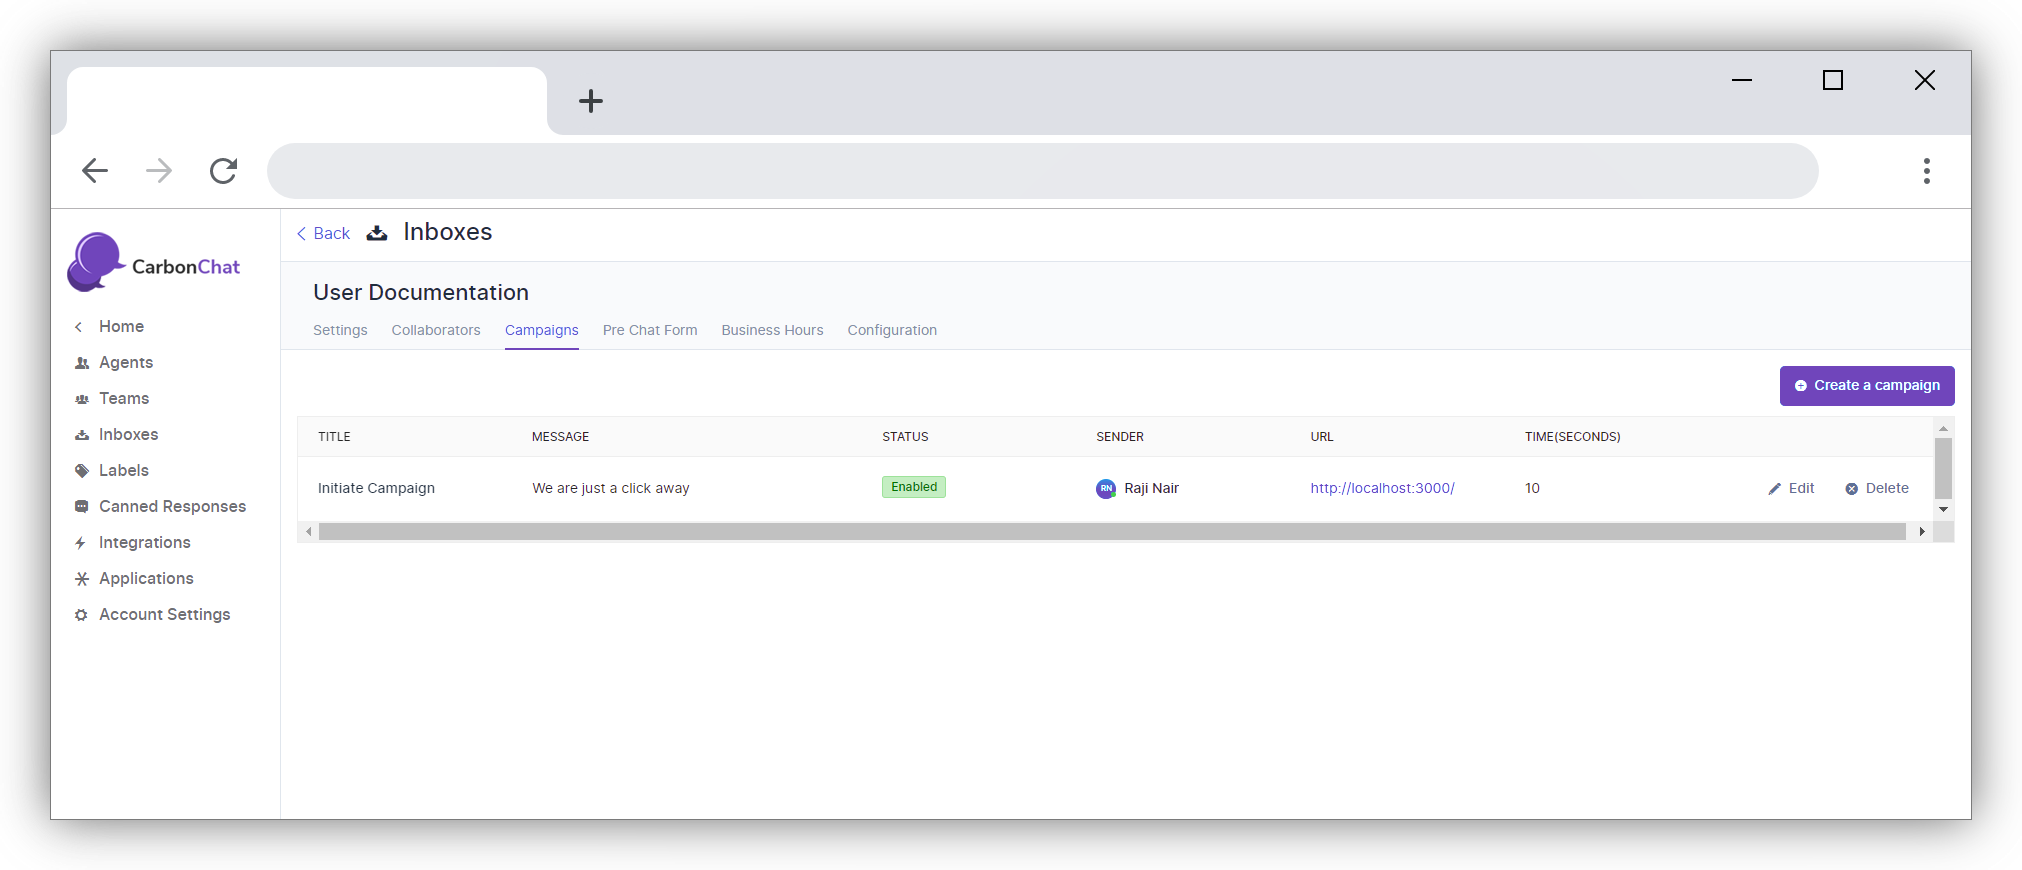
Click on update. The campaign that you have created will appear in the campaign section. You can edit or delete the Campaign whenever you want.
# Pre-Chat Form
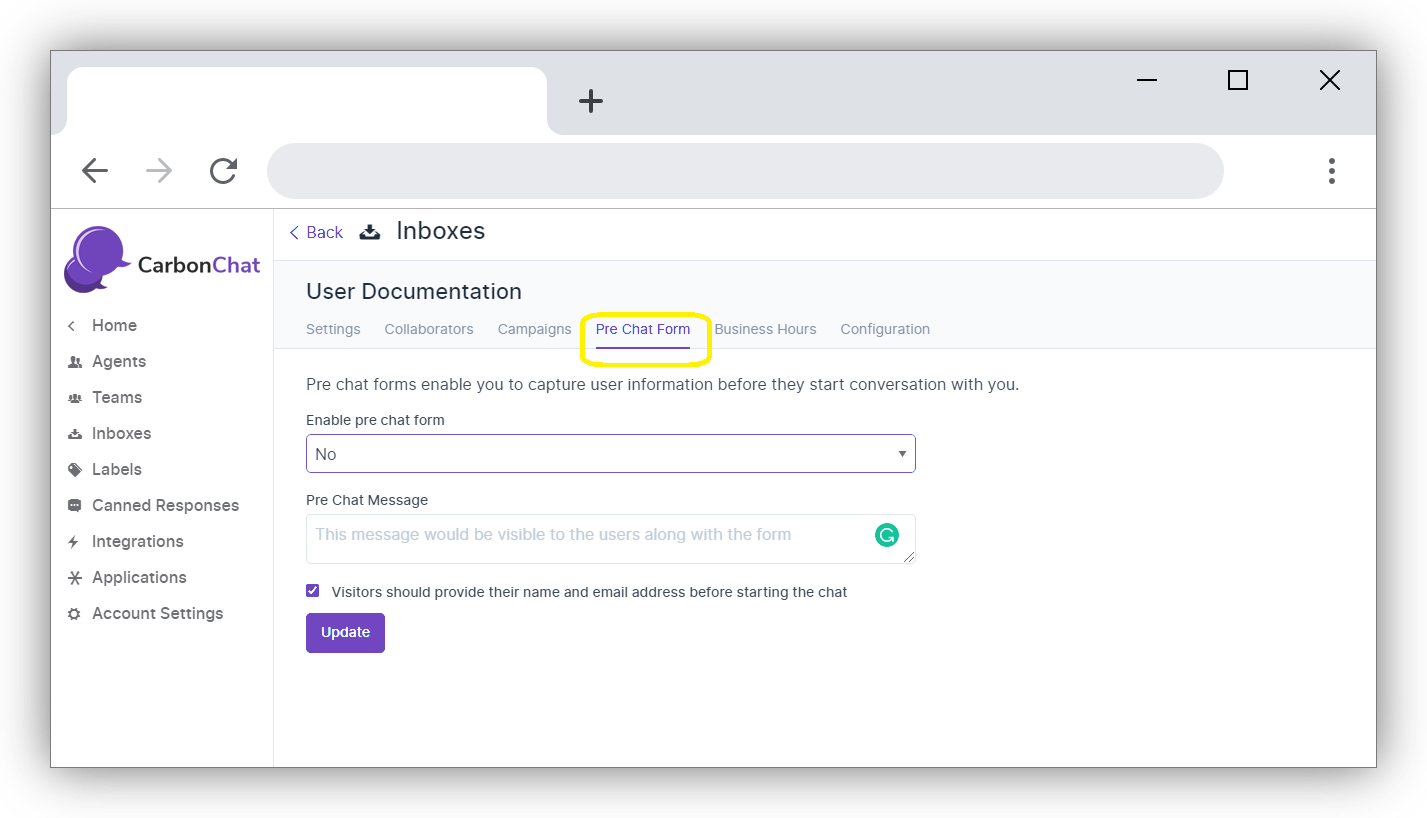
In the Inbox Settings, click on the tab Pre-Chat Form. This is an option to display message to the Customer when the customer clicks on the widget. We can use this to collect name and e-mail address before beginning the chat.
| Field Name | Value | Remarks |
|---|---|---|
| Enable pre chat form | Select Yes or No | Yes, if you want to use the pre-chat form. No if you do not want to |
| Pre-Chat Message | Give a message to start conversation with the customer | Hi ..We need some information to serve you better |
| Visitors should provide their name and email address before starting the chat | Tick on the check box if you need the name and email address mandatorily | This will help us maintain our contact list better |
Click on update. Pre-Chat Form is enabled now.
Business Hours
Click on Business Hours Tab. In this section, you can set working hours of your firm, or working hours when your agents are available online.
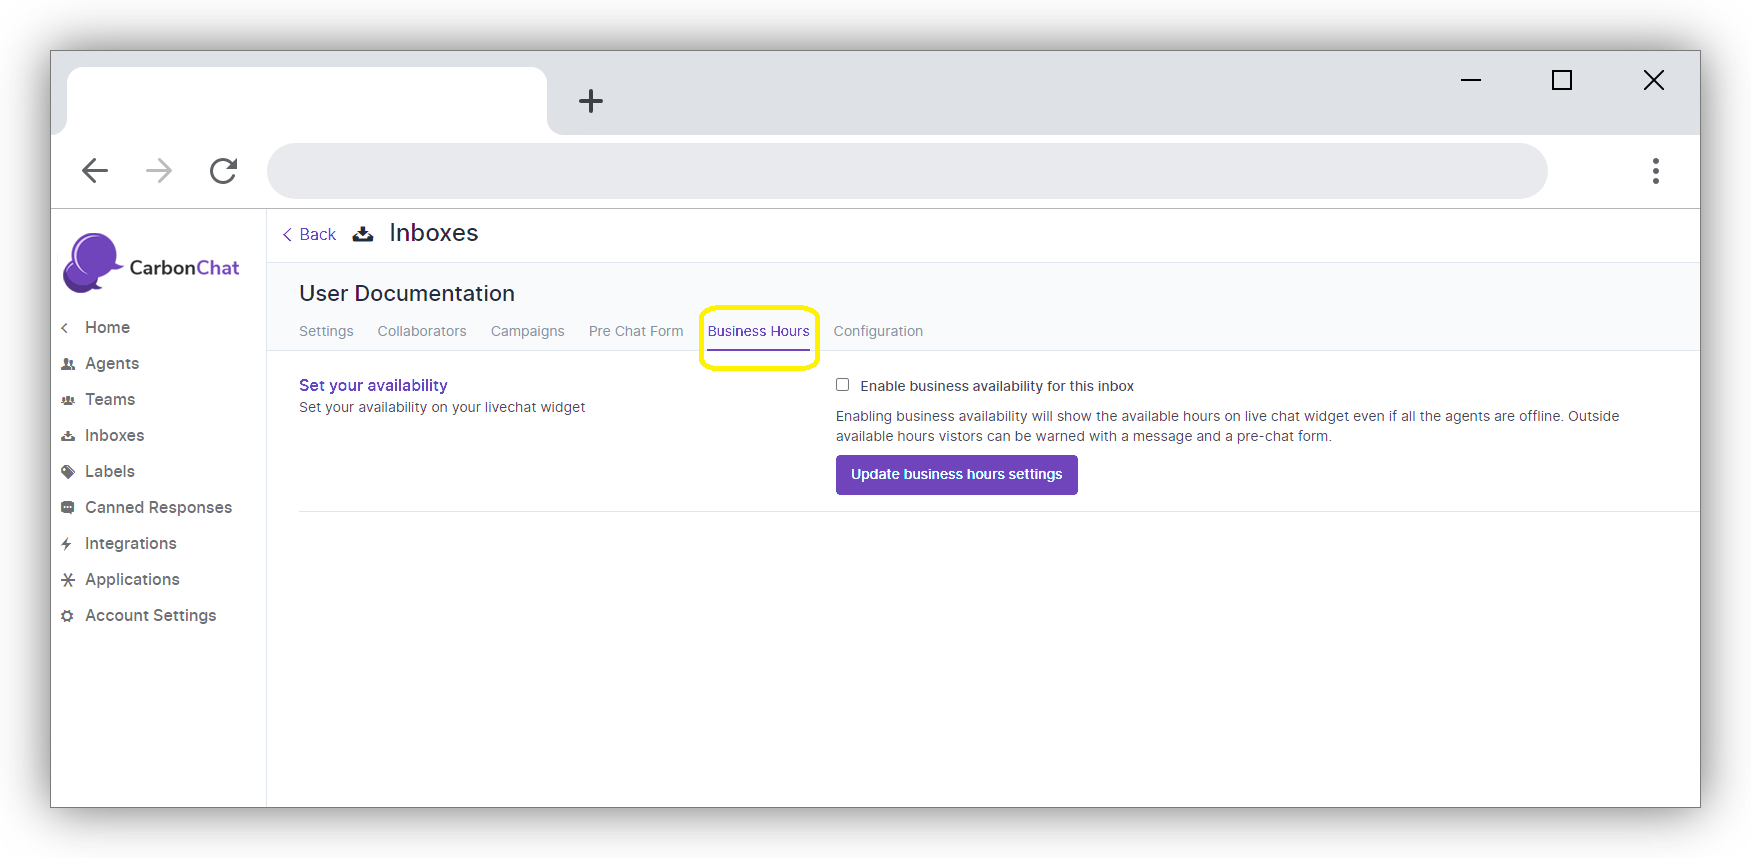
Click on the check box for 'Enable business availability for this inbox' if you have well defined business hours. Once the check box is ticked, the section below opens up where you can give your message to the customer during OFF business hours. You can also select the available business hours for each day of the week, along with proper time zone.
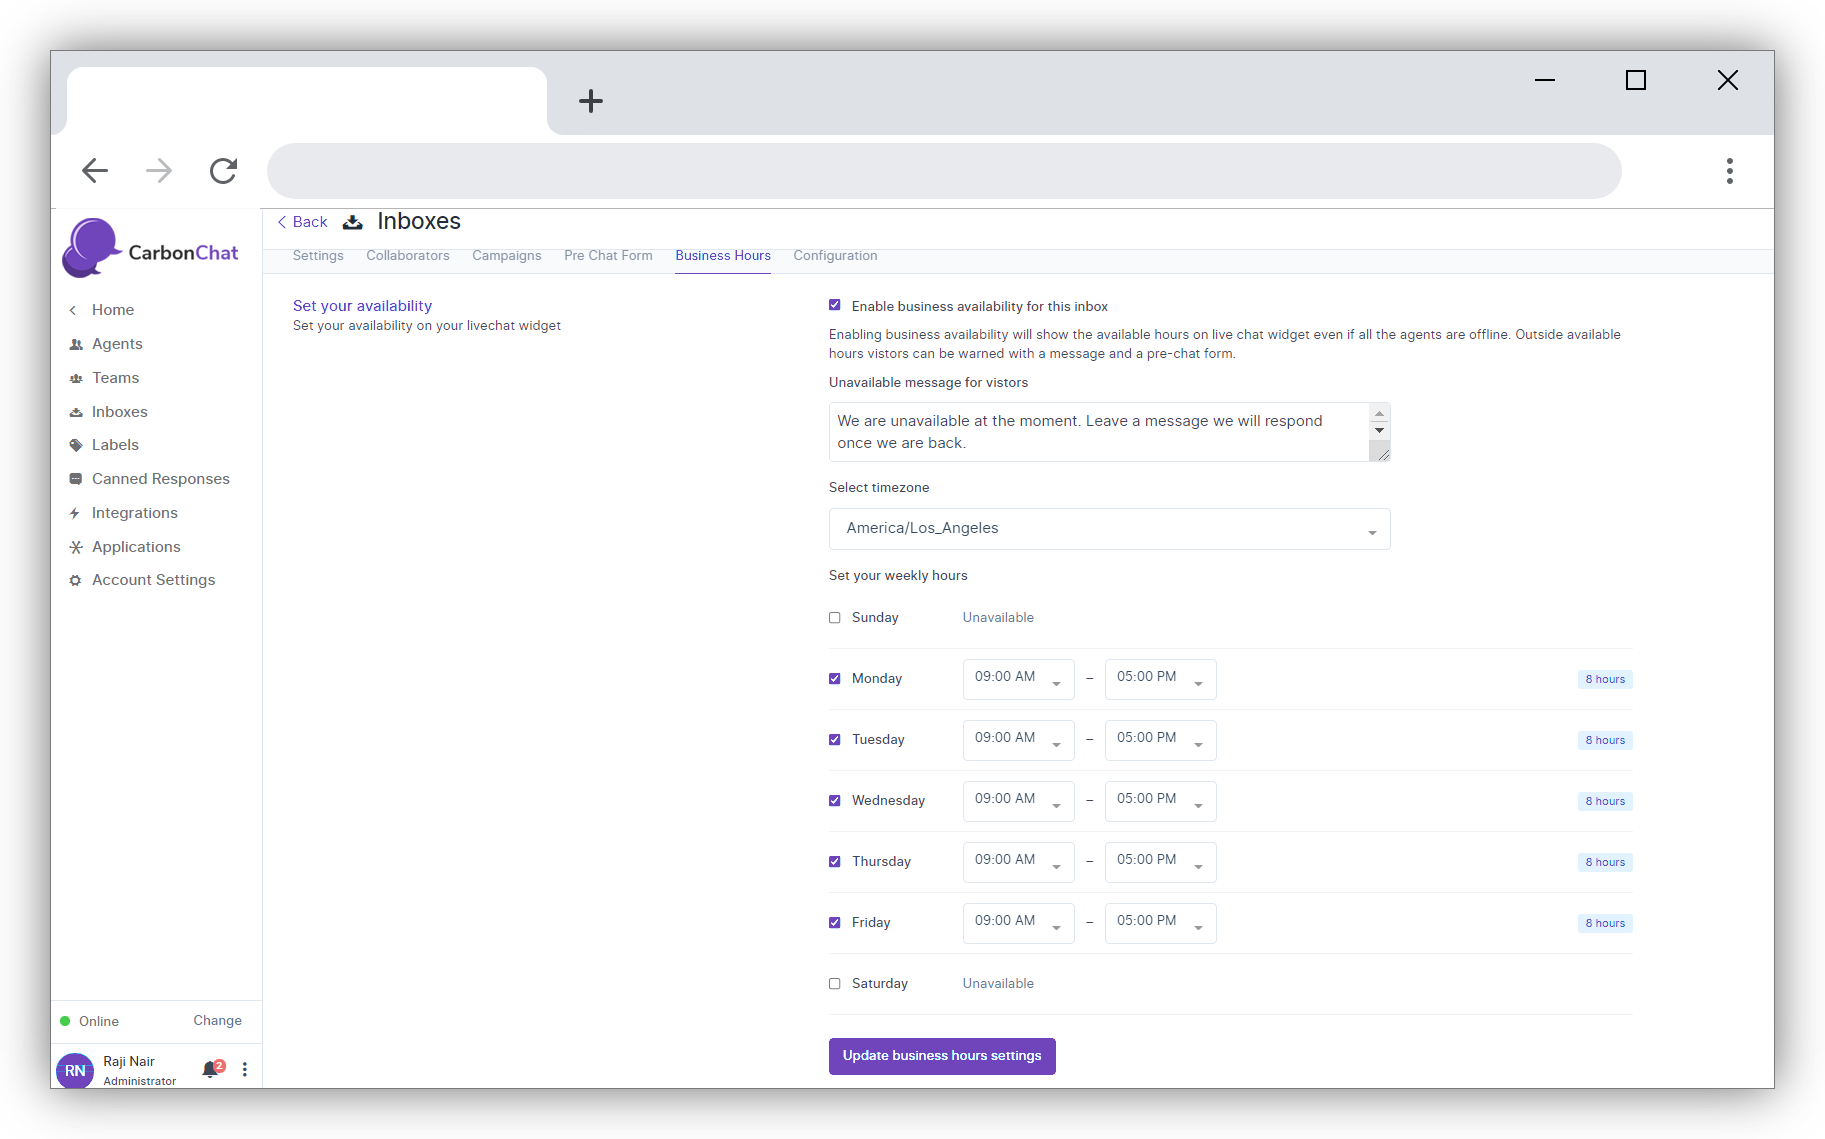
Click on Update Business Hour Setting Button.
# Configuration
Click on Configuration. The code snippet to be copied to the website will appears here.
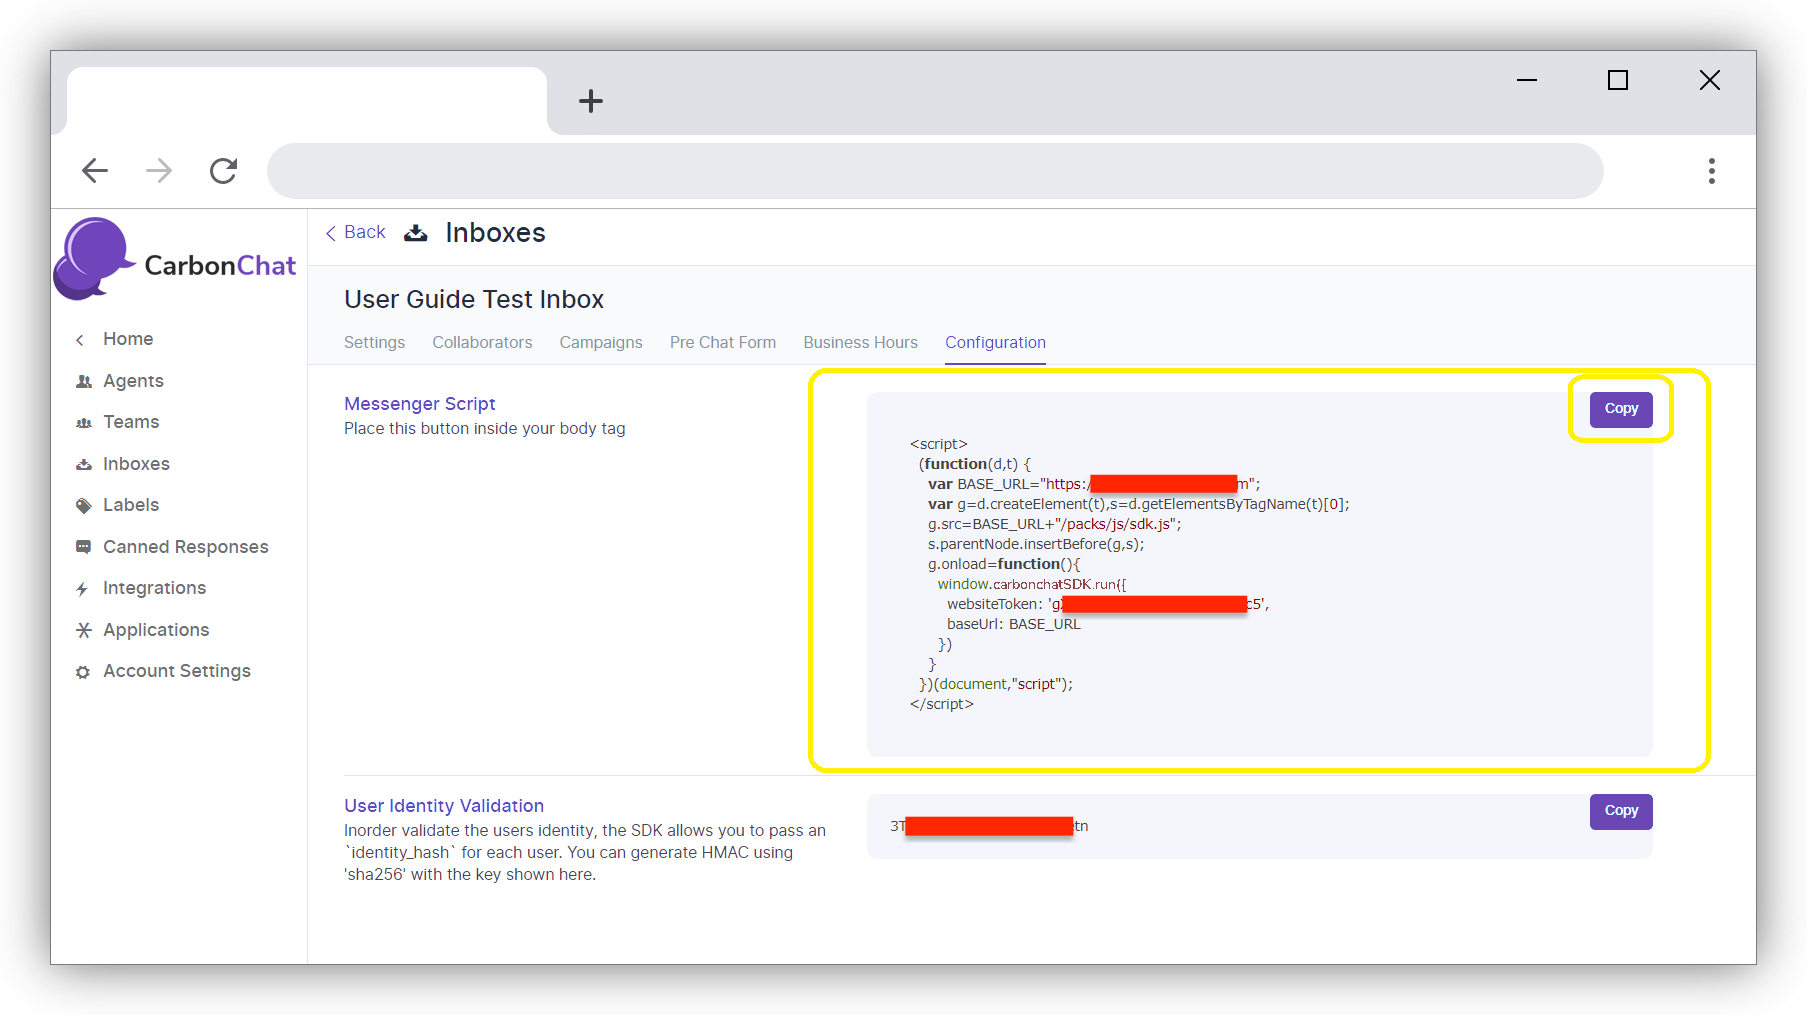
You can click on 'Copy' button to copy the code and paste in the root code (opens new window) of your website.